
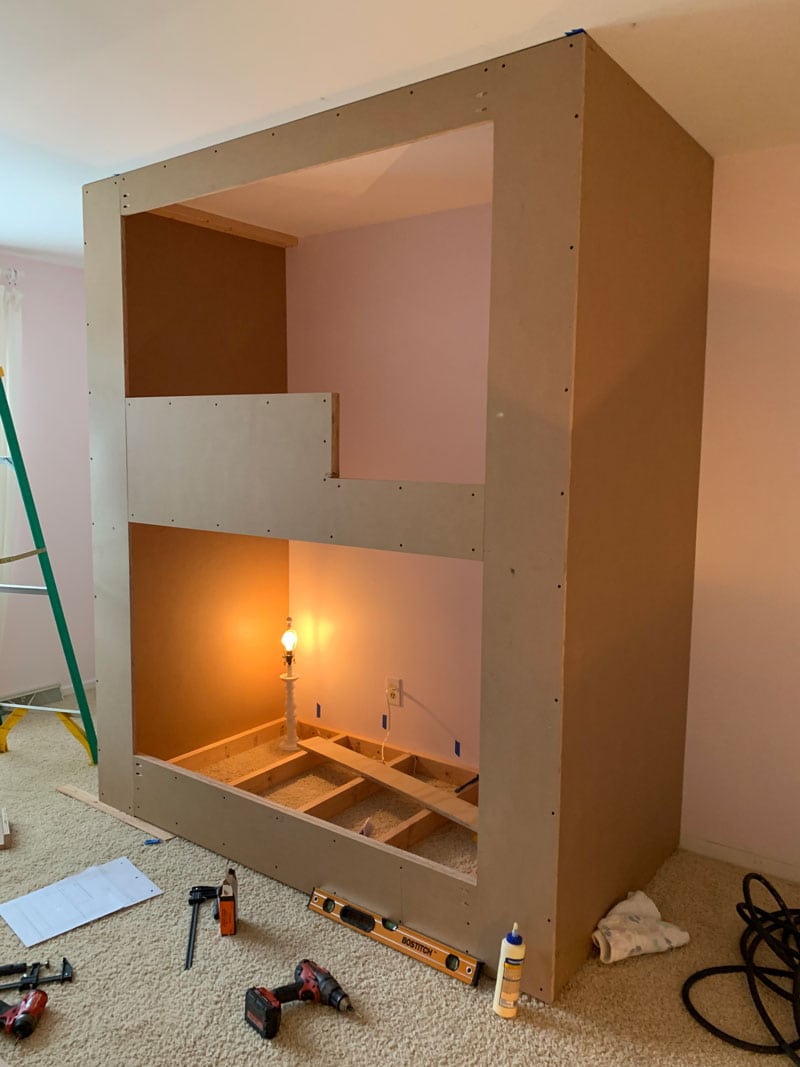
Your kid’s room measures just 38.5 inches wide—exactly one inch wider than their twin mattress. Traditional bunk beds won’t fit, and freestanding frames eat up precious floor space needed for a desk or play area. This isn’t just inconvenient; it’s a space crisis many urban families face daily. But here’s the breakthrough: by anchoring your bunk bed directly to wall studs instead of using legs, you can create a rock-solid sleeping platform that frees up 100% of your floor space. I’ll show you exactly how to make a bunk bed frame that fits these extreme constraints while supporting 500+ pounds of weight—no professional woodworking skills required.
This wall-mounted loft bed method transforms a spatial nightmare into a functional solution. As someone who’s remodeled entire houses but never built furniture, I discovered this approach solves the “impossible room” problem through strategic engineering. You’ll learn to leverage your wall’s structural strength, avoid common DIY pitfalls that compromise safety, and complete the build in a weekend with basic tools. Most importantly, you’ll create a bed so stable your kids can jump on it safely—while gaining crucial square footage underneath.
Why Standard Bunk Bed Frames Fail in Rooms Only 1 Inch Wider Than a Twin Mattress
Pre-fabricated bunk beds require 4-6 inches of clearance on each side for stability, making them impossible in rooms where the width matches your mattress plus one inch. The legs alone consume space you don’t have while creating tripping hazards in tight quarters. Worse, these frames concentrate weight on four small contact points, causing dangerous rocking on uneven floors—especially when kids move during sleep.
Critical mistake to avoid: Trying to modify a store-bought frame by trimming legs. This compromises structural integrity and creates uneven weight distribution. Instead, your wall studs become the foundation. Each stud can safely hold 200-300 pounds when properly anchored, turning your entire wall into a load-bearing system. For a twin mattress (typically 38″ wide), you’ll need at least three studs along the back wall and two on the side wall to distribute weight evenly.
How to Identify Wall Studs That Will Support Your Bunk Bed
Skip this step and your bed becomes a hazard. Use a high-end electronic stud finder (not magnetic types) to locate all studs along your planned bed height—scan vertically in 6-inch increments. Mark stud centers with bold X’s and verify by drilling a 1/8-inch pilot hole at the top mark; if you hit solid wood, you’ve found a true stud. Drywall alone supports less than 50 pounds, so every ledger board screw must hit stud center. For plaster walls, use a stud finder rated for dense materials and confirm with a thin wire probe through a pilot hole.
Installing Wall-Mounted Ledger Boards That Hold 500+ Pounds of Weight

Your ledger boards are the hidden skeleton of the bunk bed frame—get these wrong and the entire structure fails. Forget 1x4s; use 1×6 SPF lumber (spruce-pine-fir) for maximum bearing surface. The wider 5.5-inch face provides critical stability where the plywood platform rests. Cut one ledger for the back wall (matching mattress length) and one for the side wall (matching mattress width minus 1 inch for clearance).
Anchoring Ledgers to Studs Without Wall Damage
Position your level line 54 inches from the floor—ideal for a loft bed over a desk. Hold the first ledger against the wall, ensuring its top edge aligns perfectly with your level line. Drill 3/16-inch pilot holes through the ledger into each stud center, then drive 3.5-inch structural screws (like GRK RSS) with a 3/8-inch washer head. Use two screws per stud, staggered vertically to prevent splitting. Repeat for the side ledger, butting its end against the back ledger and pre-drilling a 2.5-inch screw through both boards at the corner. Pro tip: Have a helper hold the ledger while you drill—this prevents shifting that causes misaligned holes.
Building and Anchoring the Front Beam for Zero Wobble
The front beam replaces traditional legs and must handle dynamic loads when kids sit or climb. Cut a 1×6 to your exact mattress width (38.5″ for twins). Unlike the side ledgers, this beam spans open space, so stud anchoring at both ends is non-negotiable. Hold it level with the side ledger’s top edge, ensuring it’s perpendicular to the wall. Drill two 1/4-inch pilot holes through the beam into each end stud, then secure with 4-inch structural screws.
Why Beam Placement Determines Bunk Bed Stability
If your beam sits even 1/8 inch lower than the side ledgers, the plywood platform will tilt, creating stress points. Before final tightening, place a 2-foot level across the beam and ledgers. If uneven, insert shims under the beam ends until perfectly level. Then drive screws. Warning: Never anchor this beam to drywall anchors—they fail under lateral forces. If studs don’t align perfectly with beam ends, extend the beam to hit the nearest stud, even if it protrudes slightly beyond the mattress edge (you’ll hide this with the safety rail).
Cutting and Placing the Plywood Platform for Perfect Mattress Support
Your platform must be rigid enough to prevent mattress sagging while fitting precisely within the ledger frame. Use 3/4-inch ACX plywood (sanded on one side for a smooth finish) cut to 38″ x 74″ for twins. Measure the inside dimensions of your installed ledger frame—your plywood should be 1/8 inch smaller on all sides for easy insertion.
Securing the Platform Without Visible Hardware
Drop the plywood into the frame so it rests fully on all ledgers. From above, drill 1-inch-deep pilot holes every 8 inches along the platform edges, then drive 1.25-inch pocket screws downward into the ledgers. This creates a flush surface where the mattress sits. Critical check: Stand on the platform at all four corners—it should show zero flex. If it creaks, add a temporary 2×4 brace underneath while you reinforce with additional screws.
Constructing a Fall-Proof Safety Rail for Kids’ Bunk Beds
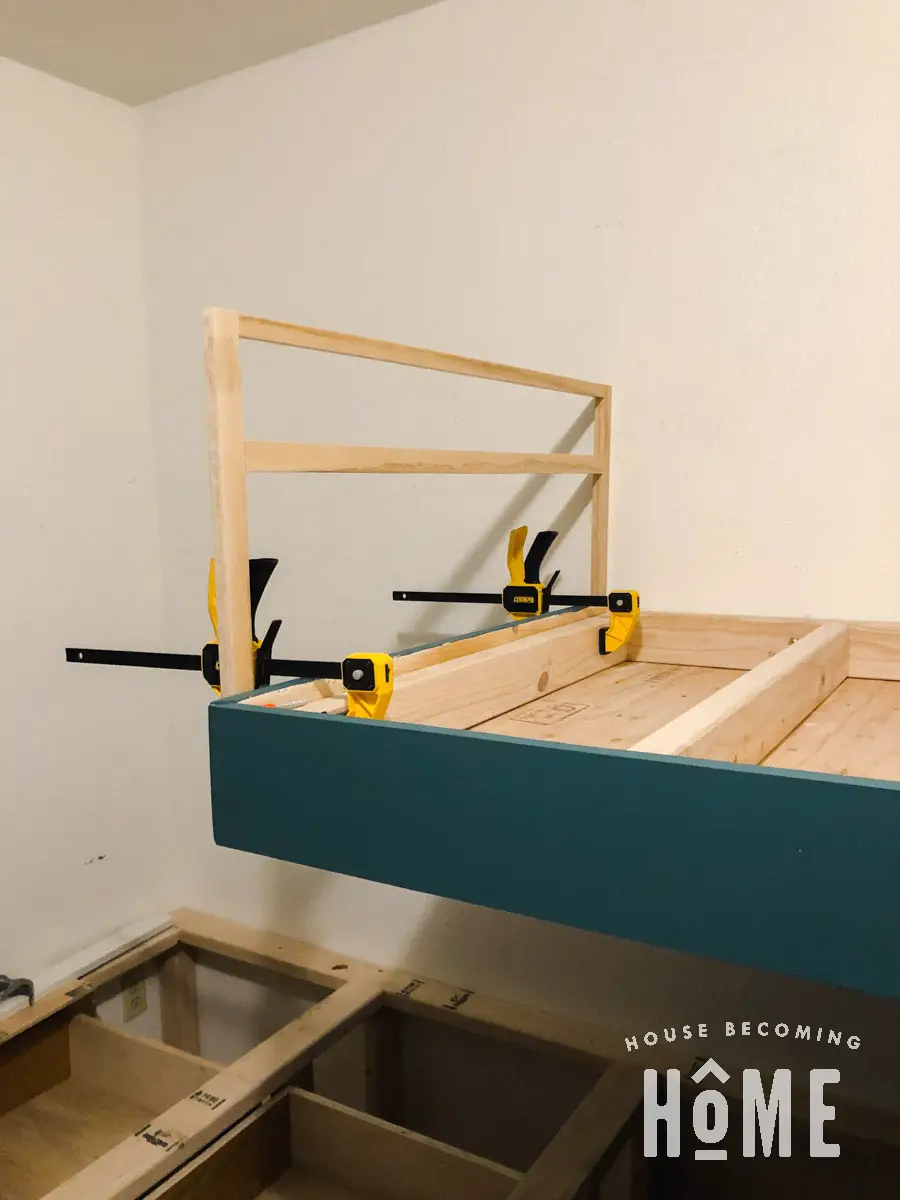
A railing isn’t optional—it’s your primary defense against nighttime falls. Build it from 2×2 poplar (splinter-resistant) to 16 inches tall from the mattress surface. The frame needs top and bottom rails connected by vertical balusters spaced under 4 inches apart (test with a tennis ball—if it fits, spacing is unsafe).
Mounting Rails That Withstand Leaning Forces
Pre-assemble the railing on the floor: attach balusters between top/bottom rails using wood glue and 2-inch screws. Position it on the platform’s open side, extending 6 inches beyond the mattress at the head for extra protection. Drill through the bottom rail into the plywood platform, then drive 3-inch screws upward into the wall studs behind the platform. Test by applying 50 pounds of sideways pressure—zero movement means it’s safe. Pro tip: Round all top rail edges with 120-grit sandpaper to prevent head injuries.
Sanding and Sealing Your DIY Bunk Bed Frame for Longevity
Rough wood causes splinters that make kids dread bedtime. Start with 80-grit sandpaper on all surfaces, focusing on platform edges and rail corners. Progress to 120-grit, then 220-grit for silky-smooth finishes. Pay special attention to the platform underside where hands might brush against it during climbing.
Choosing Non-Toxic Finishes for Child Safety
Skip oil-based polyurethane—it emits VOCs for weeks. Instead, apply two coats of water-based polyurethane (like Minwax Polycrylic) with a foam brush. It dries clear in 2 hours and becomes non-toxic after 72 hours. For the railing, add a third coat since it gets frequent contact. Time-saver: Use a random orbital sander for flat surfaces but hand-sand corners to avoid gouging.
Passing the Critical Weight Test: Final Safety Checks for Your Bunk Bed
Before allowing use, conduct these three tests: First, stand on the platform’s center and jump lightly—no creaking or movement should occur. Second, apply 100 pounds of sideways pressure to the railing (use a bathroom scale against it)—it must not shift more than 1/4 inch. Third, inspect every screw head; if any are loose, replace them immediately with the next size up.
Maintenance Tips to Extend Your Bunk Bed Frame’s Life
Check all connections quarterly as wood expands/contracts. Tighten loose screws but never overtighten—this strips the wood. Vacuum under the platform monthly to prevent dust buildup that attracts pests. If you hear new creaks, add L-brackets at ledger corners. With proper care, this frame will last through multiple kids—unlike flimsy store-bought versions that wobble within months.
This wall-mounted bunk bed frame turns spatial limitations into an advantage. By transferring weight to your home’s structure instead of floor legs, you’ve created more usable space while building something far stronger than commercial alternatives. The key was respecting your wall’s engineering—those studs weren’t just anchors; they became the foundation of a safer, smarter sleep solution. Now go enjoy that newly cleared floor space for play, study, or simply breathing room in your crowded home.


