
Your cramped bedroom feels suffocating, but what if you could double your usable floor space overnight? Lofting your bed frame solves this exact problem by elevating your mattress to create functional room underneath—perfect for a workspace, lounge area, or storage zone. This isn’t just for college dorms; homeowners and renters alike use this space-saving hack to maximize small apartments, kids’ rooms, and studio layouts. When you learn how to loft a bed frame correctly, you’ll gain 30+ inches of vertical real estate without structural renovations. Below, we cut through the confusion with actionable steps, safety-critical checks, and method-specific guidance—all verified from professional building standards. You’ll discover exactly which approach fits your skill level, avoid dangerous wobble risks, and unlock your room’s hidden potential by the end of this guide.
Verify Your Ceiling Height and Clearance Requirements First
Before touching tools, confirm your room can physically support a lofted bed. Grab a tape measure and check two non-negotiable dimensions: your ceiling height and required clearance underneath. For functional space beneath the bed, you need a minimum of 33–36 inches from floor to the bed’s bottom frame—enough room to sit at a desk or store dressers. Measure from floor to ceiling; if it’s under 7.5 feet, a full loft won’t work safely. With standard 8-foot ceilings, target 40–42 inches of clearance for comfortable movement. Remember: your mattress thickness (typically 8–12 inches) eats into this space, so subtract it from your total clearance calculation.
Next, evaluate your bed frame’s structural readiness. Metal platform frames or simple wooden bases without heavy headboards/footboards loft best. Avoid ornate frames with weak joints—they’ll flex dangerously when elevated. Crucially, calculate total weight capacity: add your mattress weight (e.g., 60 lbs for memory foam), bedding (10 lbs), and maximum sleeper weight (250+ lbs). Your loft structure must support 1.5x this total to prevent collapse. If your frame has pre-drilled holes for lofting kits, note their positions—this simplifies installation.
Choose Your Lofting Method Based on Skill and Budget

Three proven approaches exist for how to loft a bed frame, each with distinct time, cost, and safety profiles. Match your project to the right method before buying materials.
Install Bed Risers for Under-Bed Storage in 10 Minutes
Bed risers work best when you need just 6–18 inches of extra height for storage—not a full loft. Ideal for renters or beginners, this $20–$50 solution uses solid plastic or wooden blocks under existing bed legs. Here’s how to avoid common pitfalls:
- Clear the area and remove your mattress. Lift one frame corner at a time using a pry bar or helper.
- Slide risers onto legs ensuring full contact between frame foot and riser top. Never stack risers—they’ll shift.
- Level the frame with a 24-inch bubble level before reassembling. Test stability by shaking the frame vigorously.
⚠️ Critical mistake: Using cinder blocks or books as risers. They crumble under pressure and lack grip surfaces, causing dangerous slides. Only use risers rated for 500+ lbs per leg with anti-slip pads.
Assemble a Lofting Kit for Metal Frames in Under 2 Hours
Lofting kits ($80–$200) are dorm-room favorites for metal bed frames. They include four reinforced posts with height-adjustable pins and corner brackets. Follow these steps precisely:
- Attach L-brackets to your frame’s outer corners using kit-provided bolts. Tighten until snug—no wobble.
- Slide posts into brackets and set height pins at identical levels (e.g., 48 inches for desk clearance).
- Lift the entire frame onto posts, ensuring all pins lock securely into bracket holes.
This method fails if your frame lacks flat mounting points. Measure bracket compatibility before purchase—kits fit standard 1.5–2 inch metal tubing only. Never exceed the kit’s weight limit (usually 500 lbs total); add diagonal braces if supporting two sleepers.
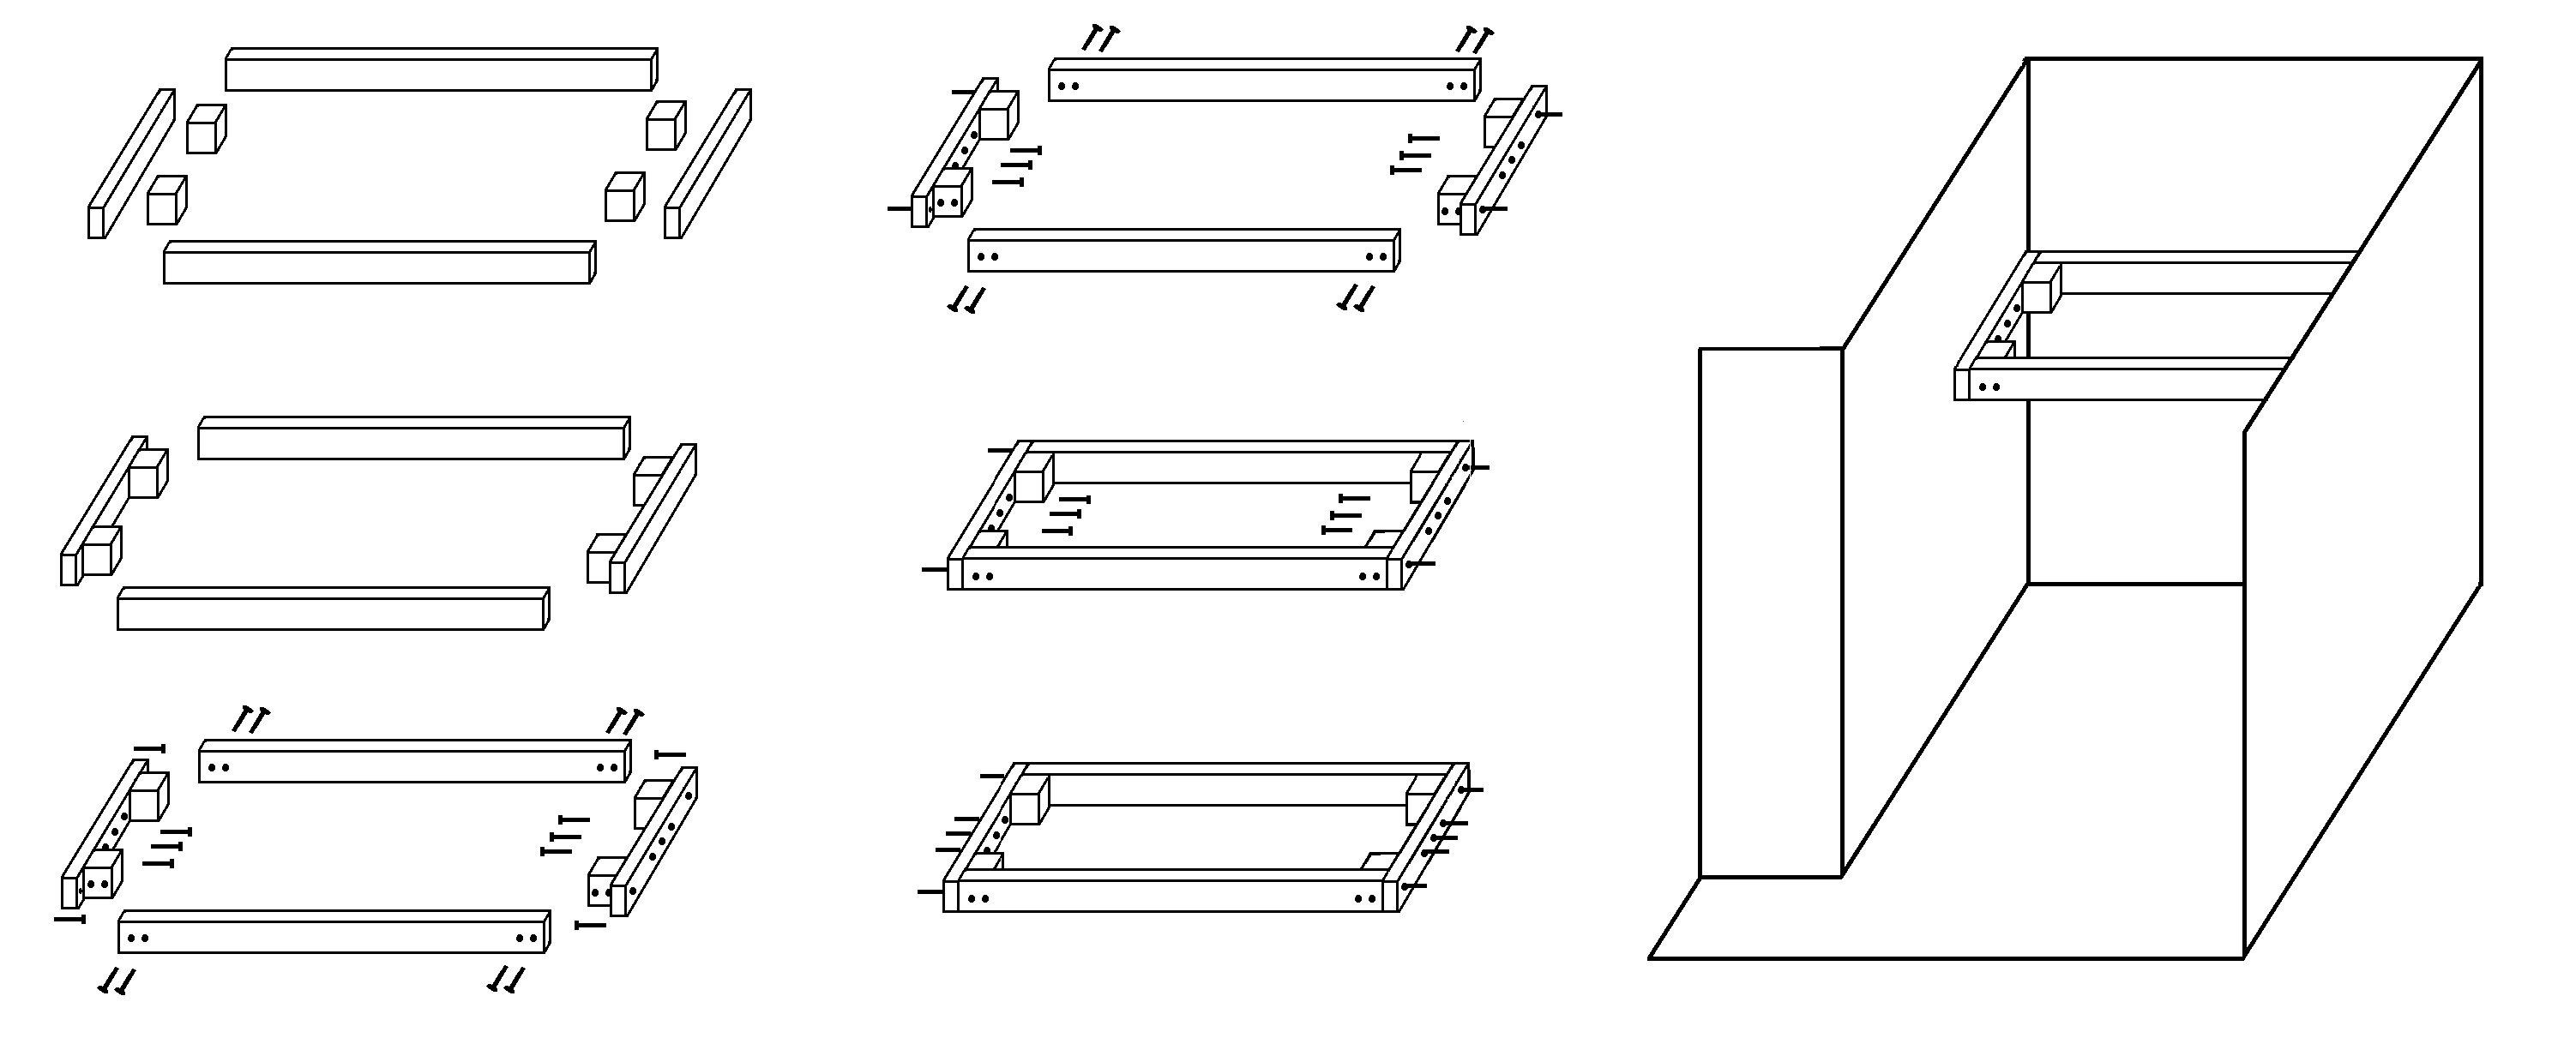
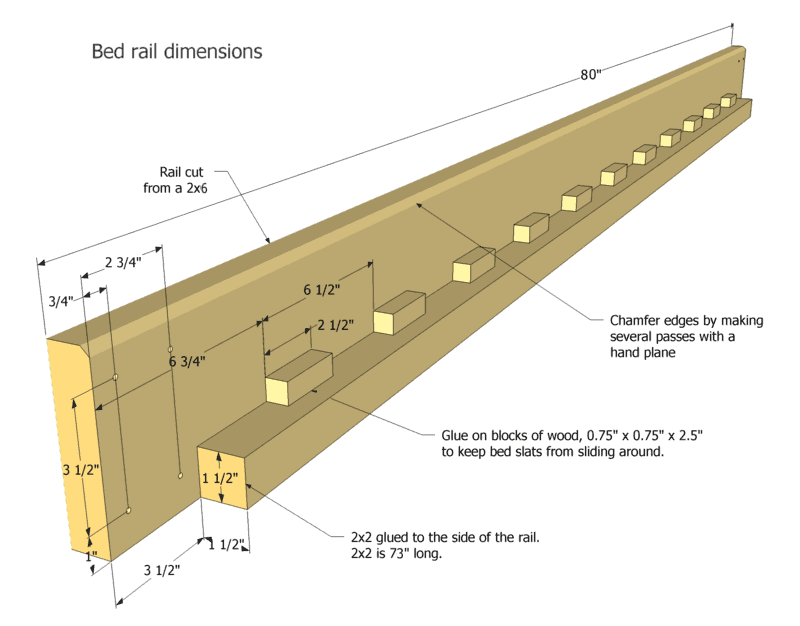
Build a DIY Loft Frame for Permanent, High-Clearance Space
For 5+ feet of usable space, a custom wooden frame is essential. This 6–8 hour project requires intermediate carpentry skills but delivers rock-solid stability. Use only kiln-dried lumber to prevent warping:
Materials checklist:
– Four 4×4 posts (cut to desired height minus 4 inches for frame thickness)
– 2×6 boards for top frame (matching mattress dimensions)
– 3/4″ plywood deck with 1-inch ventilation holes drilled every 12 inches
– 3.5″ lag bolts, metal corner brackets, and 3″ wall anchors
Construction sequence:
1. Build the rectangular top frame with reinforced corners using brackets and wood glue.
2. Secure posts to frame interior corners with two lag bolts per joint.
3. Install X-pattern 2×4 braces between posts before adding the plywood deck.
4. Anchor the entire structure to wall studs using 12-inch lag bolts—this prevents deadly tip-overs.
Skip diagonal bracing, and your frame will sway dangerously. Always use pressure-treated wood for moisture-prone areas like basements.
Anchor Your Lofted Bed Frame to Wall Studs—Non-Negotiable Safety Step
Lofted beds kill 6,000+ people yearly from tip-overs—mostly children. Anchoring to wall studs eliminates this risk. Here’s how:
- Locate studs with a magnetic detector; mark centers every 16 inches.
- Position your loft frame against the wall, ensuring posts align with two studs.
- Drill pilot holes through frame posts into studs, then secure with 3-inch lag bolts and washers.
- Test by pushing the frame sideways—it shouldn’t shift more than 1/8 inch.
Never skip this step, even in apartments. Landlords often approve anchoring if you patch holes later. In earthquake zones, add seismic straps connecting the top frame to ceiling joists.
Install Fall-Prevention Rails and Safe Access Ladders
Beds over 30 inches high require safety rails. Build a simple rail in 20 minutes:
- Cut a 2×6 board to match your bed’s width
- Attach vertically to posts using three 3.5″ screws per side
- Ensure rail height is 16+ inches above the mattress
For access, build a slanted ladder with 2×4 rungs spaced 12 inches apart. Angle it at 75 degrees from horizontal for safe climbing. Bolt it directly to wall studs—never rely on freestanding furniture. Add non-slip tape to rungs. Check all connections monthly; retighten bolts if you hear creaking.
Design Your New Space Under the Lofted Bed Frame
Now maximize your hard-earned square footage. With 36+ inches of clearance, create:
- A productivity zone: Fit a 48-inch desk under twin beds; add task lighting and cable management
- Storage sanctuary: Use shallow drawers (under 24 inches tall) for clothes or bins for seasonal items
- Cozy lounge: Place a floor cushion and side table for reading—ensure 18 inches of headroom when seated
Avoid placing heavy furniture directly under the bed; uneven weight distribution strains the frame. Leave 6 inches of airflow space around walls to prevent moisture buildup. For kids’ rooms, add LED strip lighting under the frame for nighttime visibility.
Final Safety Checks Before Using Your Lofted Bed
Complete these tests every time you assemble or adjust your loft:
- Shake test: Apply 50 lbs of force sideways—no movement beyond 1/4 inch.
- Weight test: Stack 200+ lbs of books on the frame overnight; check for sagging.
- Squeak check: Tighten all bolts until joints are silent when pressed.
If your frame wobbles, add corner gussets (triangular plywood braces) at weak points. Never use the bed until it passes all tests—your safety depends on this.
Maintain Your Lofted Bed Frame for Long-Term Safety
Monthly upkeep prevents disasters. During your check:
- Tighten all bolts and lag screws (wood shrinks over time)
- Inspect posts for cracks—replace if you see splintering
- Confirm wall anchors haven’t pulled loose from studs
After moving the bed, redo all safety tests. In humid climates, treat wood frames annually with mold-resistant sealant. With proper care, your lofted bed frame will last 10+ years.
By following these exact steps for how to loft a bed frame, you’ve transformed wasted vertical space into functional living area—safely and affordably. Remember: anchoring to wall studs and installing fall rails aren’t optional extras; they’re life-saving requirements. Whether you used $20 risers or built a custom frame, your room now breathes with new possibilities. Start designing that dream workspace or cozy lounge underneath, and enjoy every inch of your reclaimed space. For ongoing safety, bookmark this guide and repeat your stability tests every season—your future self will thank you.


