
That stubborn orange-brown rust creeping across your metal bed frame isn’t just ugly—it’s actively eating away at your furniture’s structural integrity. Left untreated, rust weakens joints and legs, turning a solid foundation for restful sleep into a wobbly hazard. If you’ve noticed flaky patches on your bed frame after a humid summer or accidental spill, you’re not alone. Millions of households battle metal corrosion annually, but replacing an entire bed frame costs $200-$500 unnecessarily. The good news? You can get rust off metal bed frame components permanently with household items and strategic techniques. This guide delivers a battle-tested restoration process that salvages your investment while preventing future damage—no professional help required for most cases.
Rust forms when iron in metal oxidizes through contact with moisture and oxygen, creating that familiar crumbling texture. While minor surface rust is common in humid climates or near coastal areas, ignoring it accelerates deterioration. But here’s what most guides won’t tell you: complete rust removal requires attacking corrosion at three levels—loose flakes, embedded particles, and the underlying chemical reaction. By following these steps, you’ll not only restore appearance but also stop rust’s progression at the molecular level. Within 2-3 hours (plus drying time), your bed frame will look factory-fresh and resist future corrosion. Let’s reclaim your sanctuary.
Essential Safety Gear for Metal Bed Frame Rust Removal
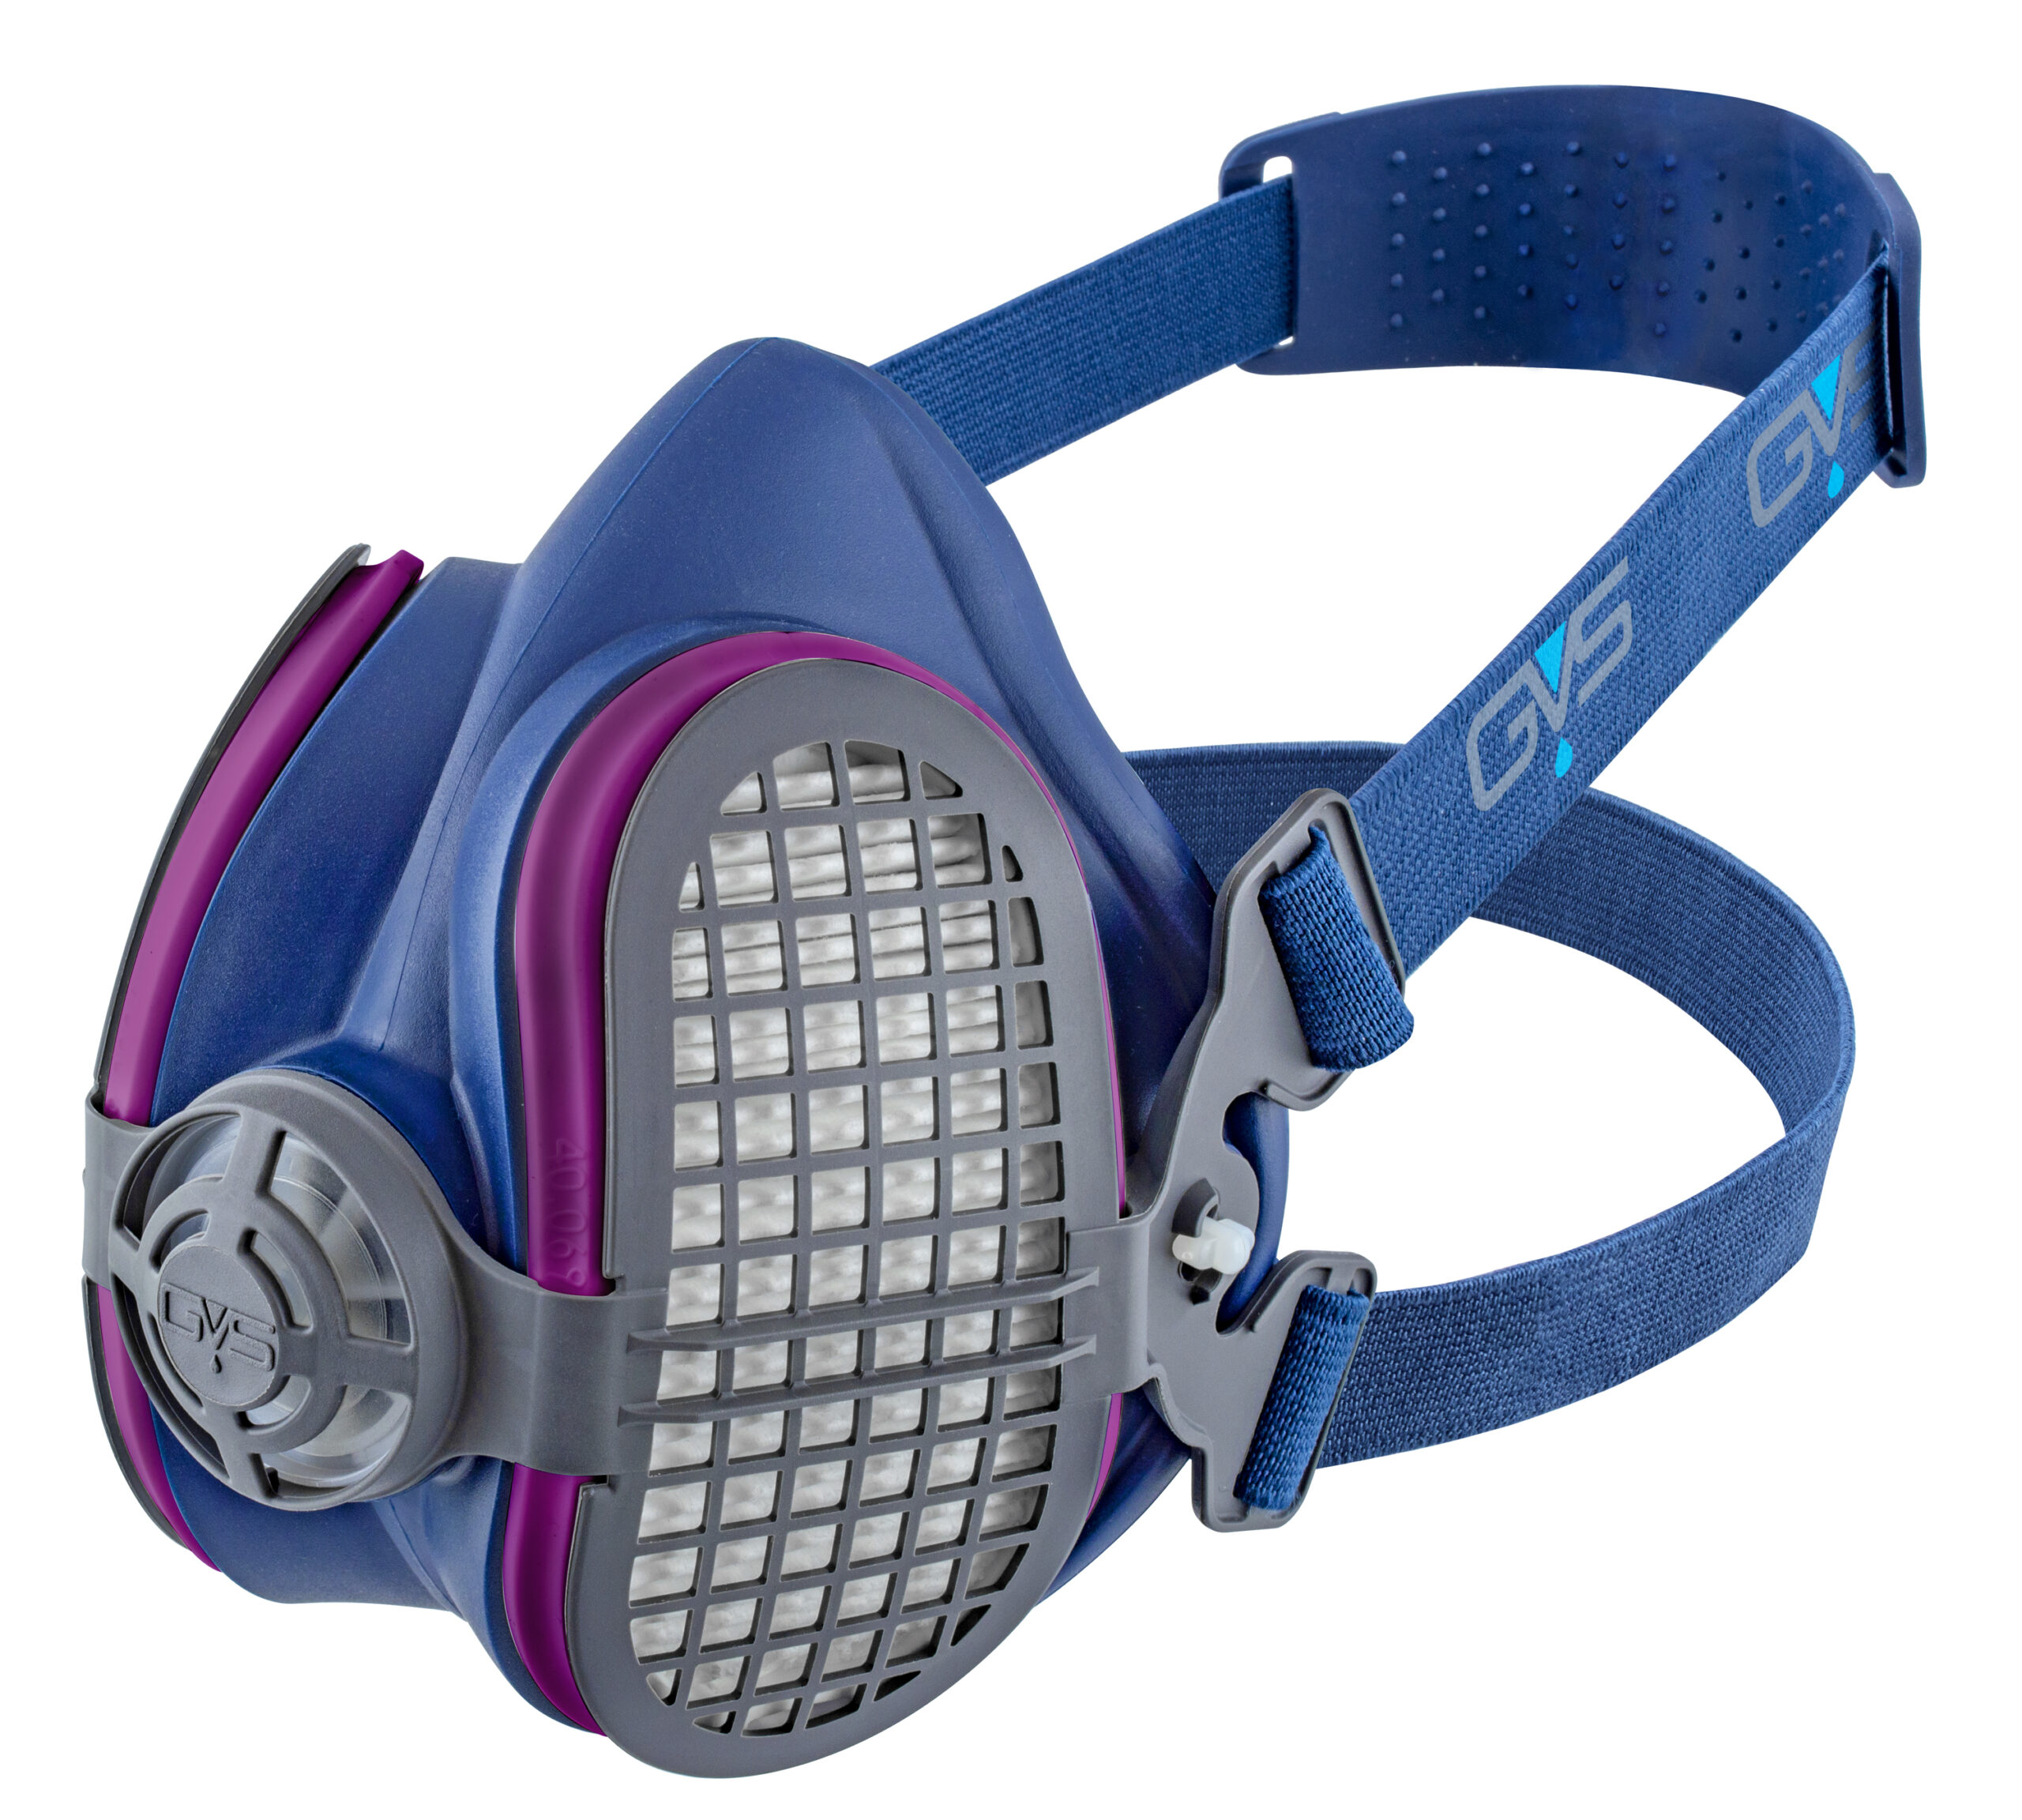
Skipping proper protection during rust removal risks respiratory damage from airborne particles and chemical burns. Rust dust contains iron oxide compounds that irritate lungs, while chemical strippers like Naval Jelly contain phosphoric acid requiring serious precautions. Never attempt this process without these non-negotiable safeguards:
- P100 respirator mask (not a basic dust mask): Filters 99.97% of rust particles and chemical vapors. N95 masks won’t block fine rust dust.
- Chemical-resistant gloves (nitrile or neoprene): Latex gloves dissolve when exposed to rust removers.
- Safety goggles with side shields: Flying metal fragments during sanding can cause eye injuries.
- Ventilation minimums: Work outdoors whenever possible. If indoors, position two box fans blowing outward from open windows—never rely on a single fan.
Critical mistake alert: Never mix vinegar with commercial rust removers. The acid reaction creates toxic chlorine gas. Always rinse metal thoroughly between solution applications.
Tools and Supplies Needed to Get Rust Off Metal Bed Frames
.jpg)
Gather these specific items before starting—substituting improper tools causes incomplete rust removal or surface damage. The right equipment makes the job 70% faster:
Rust Removal Essentials
- Wire brushes: Stiff brass-bristle brush for hand work + drill-mounted wire wheel attachment (saves 45+ minutes on large frames)
- Grit progression: 80-grit (aggressive rust removal) followed by 120-grit sandpaper (smoothing)
- Rust dissolvers: White vinegar (for light rust) OR Naval Jelly rust remover (for pitted areas)
- Primer/paint: Oil-based rust-inhibiting primer (Rust-Oleum Stops Rust) + matching metal spray paint
Pro Setup Tips
- Use a plastic tub larger than your frame sections for vinegar soaks (no metal containers—they corrode)
- Keep a shop vacuum nearby to capture rust dust immediately after sanding
- Prep 3 clean microfiber cloths: one damp (for wiping), one dry (dust removal), one for vinegar application
Time-saver: For ornate frames with crevices, wrap steel wool around a toothpick to reach intricate details.
Disassemble Your Metal Bed Frame Before Rust Removal
Why skip this? You’ll miss hidden rust in joints and risk paint drips on mattresses. Complete disassembly ensures 100% surface access:
- Remove all bedding and mattress—place on protected surface elsewhere
- Label every bolt/nut with painter’s tape indicating its location (e.g., “Left Headboard Top”)
- Lay drop cloths in your workspace (garage/driveway ideal)
- Work systematically: headboard → footboard → side rails → center support
Visual cue: Check for rust “bleed” under paint near bolt holes—a sure sign corrosion has spread internally. If frame pieces resist separation, tap joints gently with a rubber mallet (never hammer directly on metal).
Remove Loose Rust and Deep Clean Your Bed Frame
This two-phase process eliminates surface contaminants before tackling embedded rust:
Phase 1: Degrease and Loosen Flakes (15 minutes)
- Mix 1:1 white vinegar and warm water in a spray bottle
- Spray solution onto rusted areas, letting it sit 5 minutes to break down grime
- Scrub vigorously with stiff wire brush using back-and-forth motions (not circles)
- Focus on pitted areas where rust hides—listen for the scritch sound indicating particle removal
Phase 2: Aggressive Rust Stripping (30-45 minutes)
- Attach wire wheel brush to drill at lowest speed setting
- Hold drill perpendicular to metal surface, moving steadily along rust lines
- Stop immediately if metal glows red—you’re generating dangerous heat
- Switch to 80-grit sandpaper for corners and drill-inaccessible spots
- Wipe surface with damp cloth—must see bare, uniform metal before proceeding
Pro tip: For stubborn spots, make a paste of baking soda and water, apply with toothbrush, then rinse. This neutralizes residual acidity before chemical treatments.
Effective Rust Removal Solutions for Metal Bed Frames
Choose the right method based on rust severity—using vinegar on severe corrosion wastes time, while chemical removers damage light surface rust:
For Light Surface Rust: White Vinegar Soak Method
- Submerge small parts in undiluted white vinegar (or wrap large sections in vinegar-soaked rags)
- Wait 12-24 hours—rust dissolves into orange sludge
- Scrub with steel wool, then rinse thoroughly with water
- Critical step: Neutralize acid with baking soda paste before drying
Time estimate: 18 hours total (mostly inactive soak time). Best for frames with <20% rust coverage.
For Heavy Rust and Pitting: Naval Jelly Application
- Apply thick coat of Naval Jelly with disposable brush—cover all rusted areas
- Wait exactly 20 minutes (set timer—overexposure etches metal)
- Watch for color change: Rust turns dark blue/black as it converts
- Rinse with water until runoff runs clear
- Scrub residual gel with stiff brush under running water
Warning: Naval Jelly leaves a black primer layer—do not sand this off. It’s the protective barrier enabling paint adhesion.
Prime and Paint Your Rust-Free Metal Bed Frame
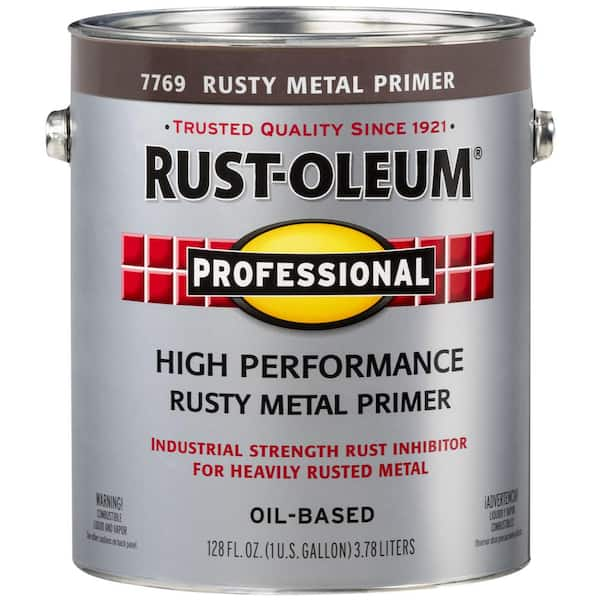
Skipping proper priming guarantees rust returns within months. This failsafe sequence creates a moisture barrier:
Step 1: Surface Prep (Non-Negotiable)
- Let frame dry 24 hours in low-humidity area—any moisture traps rust
- Wipe with mineral spirits on lint-free cloth to remove oils
- Vacuum all crevices, then use tack cloth for final dust removal
Step 2: Primer Application
- Spray oil-based rust-inhibiting primer in thin, even coats (keep can 10-12″ from surface)
- Key technique: Apply crisscross pattern—horizontal pass first, vertical pass after 15 minutes
- Dry time: Minimum 4 hours before painting (check can instructions)
Step 3: Final Paint Coating
- Use metal-specific spray paint in your chosen finish
- Apply 2-3 light coats (never one thick coat—causes drips)
- Wait 30 minutes between coats
- Pro move: Add clear matte topcoat for high-contact areas like legs
Visual check: Finished surface should feel uniformly smooth with no “orange peel” texture.
Reassemble Your Bed Frame After Rust Removal
Rushing reassembly cracks new paint. Follow this sequence:
- Let paint cure 72 hours before reassembly (not just dry time)
- Place frame sections on soft blanket to prevent scratches
- Insert bolts by hand first—never force hardware
- Tighten in star pattern (like lug nuts) to distribute pressure evenly
- Test stability by applying weight to each corner before remaking bed
Critical check: Inspect all joints for paint chips. Touch up immediately with small brush and matching paint.
Prevent Future Rust on Metal Bed Frames
Your restoration lasts only with proactive defense. Implement these non-negotiable habits:
- Monthly inspection: Run fingers along welds and joints—catch pinprick rust spots early
- Humidity control: Keep bedroom below 50% humidity with dehumidifier (ideal: 30-40%)
- Barrier application: Every 6 months, rub frame with automotive paste wax using microfiber cloth
- Spill response: Wipe moisture within 10 minutes—rust begins oxidizing in 2 hours
Pro tip: Place silica gel packets inside hollow frame tubes to absorb internal moisture. Replace quarterly.
When to Hire a Pro for Bed Frame Rust Repair
DIY fails when rust compromises structural integrity. Call a metal fabricator immediately if you see:
– Holes larger than a dime in load-bearing sections
– Legs that bend under light pressure
– Rust spreading under paint beyond treated areas
– Welded joints separating at seams
Professionals use MIG welding to patch holes and industrial-grade rust converters unavailable to consumers. Cost ($100-$300) beats replacement if frame has sentimental value.
Restore Your Metal Bed Frame: Rust Removal Success
Getting rust off your metal bed frame isn’t just cosmetic—it’s structural preservation. By following this targeted process, you’ve transformed flaky corrosion into a durable, protected surface that resists moisture at the molecular level. Remember the critical triad: complete rust removal → proper priming → humidity control. Your restored frame now has a 5-10 year rust-free expectancy with minimal maintenance. Sleep soundly knowing you’ve extended your furniture’s life while avoiding unnecessary landfill waste. For ongoing protection, apply a fresh coat of automotive wax each season and inspect joints after humid months. That satisfying thud when you test your bed’s stability? That’s the sound of a job well done—and many restful nights to come.
Final note: Always store leftover Naval Jelly and vinegar in original containers—never mix chemicals. Keep all rust removal tools in a dedicated container away from children.


