
Your mattress sinking into a wobbly metal frame? Or tired of chemical-laden particleboard beds that squeak with every turn? How to build a cedar bed frame solves both problems while filling your bedroom with nature’s calming scent. Cedar’s natural oils repel insects, resist decay, and create a bed frame that lasts decades—not years. Unlike pine or plywood alternatives, cedar won’t warp under weight and showcases stunning grain patterns that transform functional furniture into art. In this guide, you’ll discover how to construct a squeak-free queen bed frame using screws-and-glue techniques that outlast store-bought versions, all while avoiding common pitfalls like mattress slippage or splintered wood.
Forget complicated joinery or expensive tools. With Northern White Cedar—readily available at home improvement stores—you’ll build a bed that’s rigid enough for memory foam mattresses yet simple enough for intermediate DIYers. I’ll walk you through exact measurements, the tung oil finish that highlights cedar’s natural beauty, and why skipping a raised lip won’t send your mattress sliding. Let’s turn rough-cut boards into a centerpiece that blends rustic charm with engineering precision.
Why Cedar Beats Pine for Your DIY Bed Frame (Durability & Scent)
Cedar isn’t just pretty—it’s engineered by nature for longevity. Northern White Cedar contains thujaplicins, organic compounds that repel moths, termites, and mildew without toxic additives. While pine frames often sag within two years, cedar’s straight grain and low resin content prevent warping under 200+ pounds of mattress weight. Home Depot cedar pickets (typically 1×4 or 1×6) work perfectly for headboards, offering tight knots and consistent thickness at half the cost of specialty lumber.
Pro Tip: Run your hand across the board—if it feels smooth and smells earthy (not musty), it’s prime for bed frames. Avoid boards with large knots near edges; they’ll crack when screwed. For structural rails, opt for kiln-dried cedar to minimize shrinkage after assembly.
Exact Cedar Lumber Dimensions for Queen, King, and Twin Frames
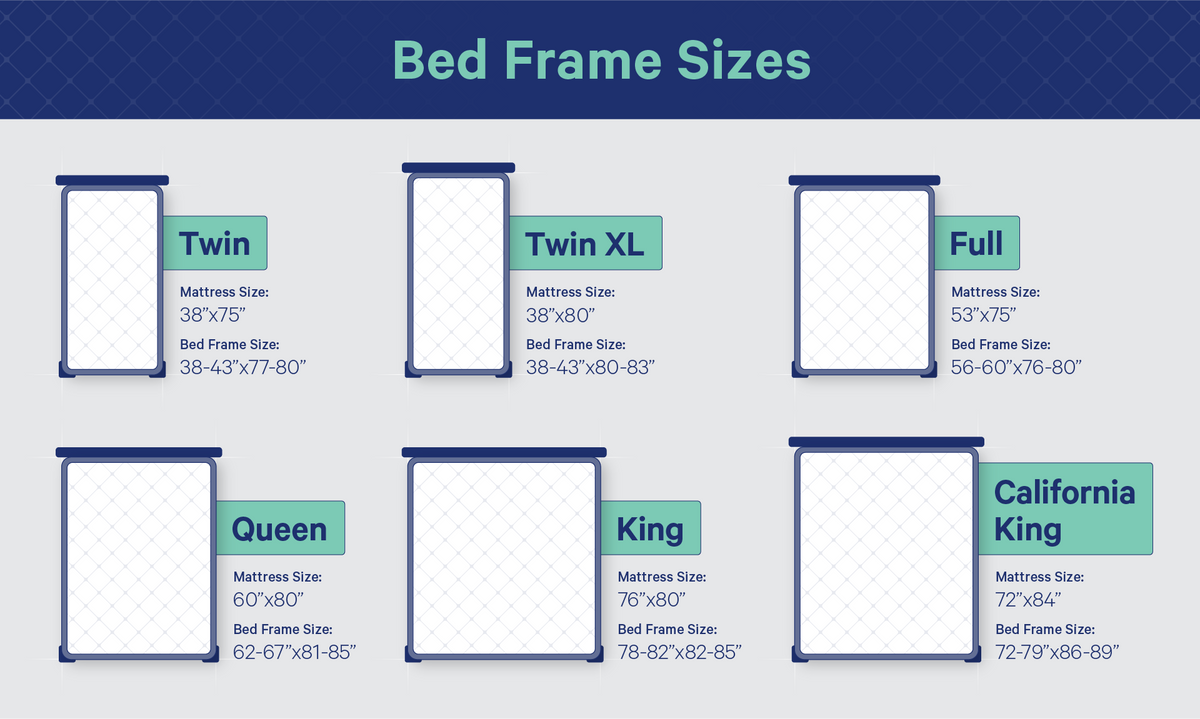
Skip guesswork with these battle-tested measurements. For a queen bed (60″ x 80″ mattress), cut your internal frame ½ inch smaller than the mattress dimensions—59.5″ wide x 79.5″ long—to accommodate bedding without gaps. Here’s your cut list using 2×6 cedar for side rails and head/footboards:
- Side Rails: Two pieces at 79.5″ long (length of frame)
- Headboard/ Footboard: Four vertical posts at 32″ tall; horizontal top rails at 59.5″ wide
- Support Slats: Twelve 1×4 cedar boards at 59.5″ wide (spaced 2.5″ apart)
- Center Beam: One 2×6 at 59.5″ long (critical for queen/king sizes)
King beds require three center legs; twins skip the center beam. Always cut side rails first—they anchor your entire structure. Use a carpenter’s square to mark lines, then clamp a straight-edge guide to your circular saw. This prevents the “drifting cut” that ruins cedar’s soft grain.
Must-Have Tools: Skip These and Risk a Wobbly, Squeaky Frame
Don’t waste hours on a frame that creaks like a haunted house. These seven tools guarantee rigidity:
- 3/16″ Brad-point drill bits (prevents wood tear-out)
- Exterior-grade #10 x 2.5″ screws (stainless steel for humidity resistance)
- Kreg Jig Pocket Hole System (for hidden, glue-reinforced joints)
- Random-orbit sander (80/120/220 grit paper; orbital sanders swirl soft cedar)
- 12″ Bar clamps (holds rails perfectly square during glue-up)
- Tung oil and lint-free rags (penetrates deeper than polyurethane)
- Carpenter’s level (verifies slats sit flush—sagging starts here)
Critical Mistake to Avoid: Using standard wood screws without pilot holes. Cedar splits easily; drill holes ⅛” wider than screw shafts. For corner joints, pocket holes with wood glue create silent, immovable connections—no more midnight squeaks.
Cutting Cedar Boards Without Splinters: Pro Tips for Clean Cuts
Cedar’s soft fibers splinter easily, ruining that smooth finish. Prevent this with three techniques:
Score Your Cut Line First
Place masking tape along your marked line. Use a utility knife to score the grain (cutting with the wood’s direction). This severs fibers before the saw blade hits them.
Adjust Saw Speed and Depth
Set circular saws to lowest RPM setting. Blade depth should extend only ¼” below the board. High speeds tear cedar; shallow depth reduces vibration. For miter cuts, flip the board and cut from the bottom—the blade exits upward, minimizing top-surface splinters.
Support the Waste Side
Never let cut-off pieces hang freely. Prop them with scrap wood so the blade exits fully supported. Unsupported ends cause tear-out on the finished piece.
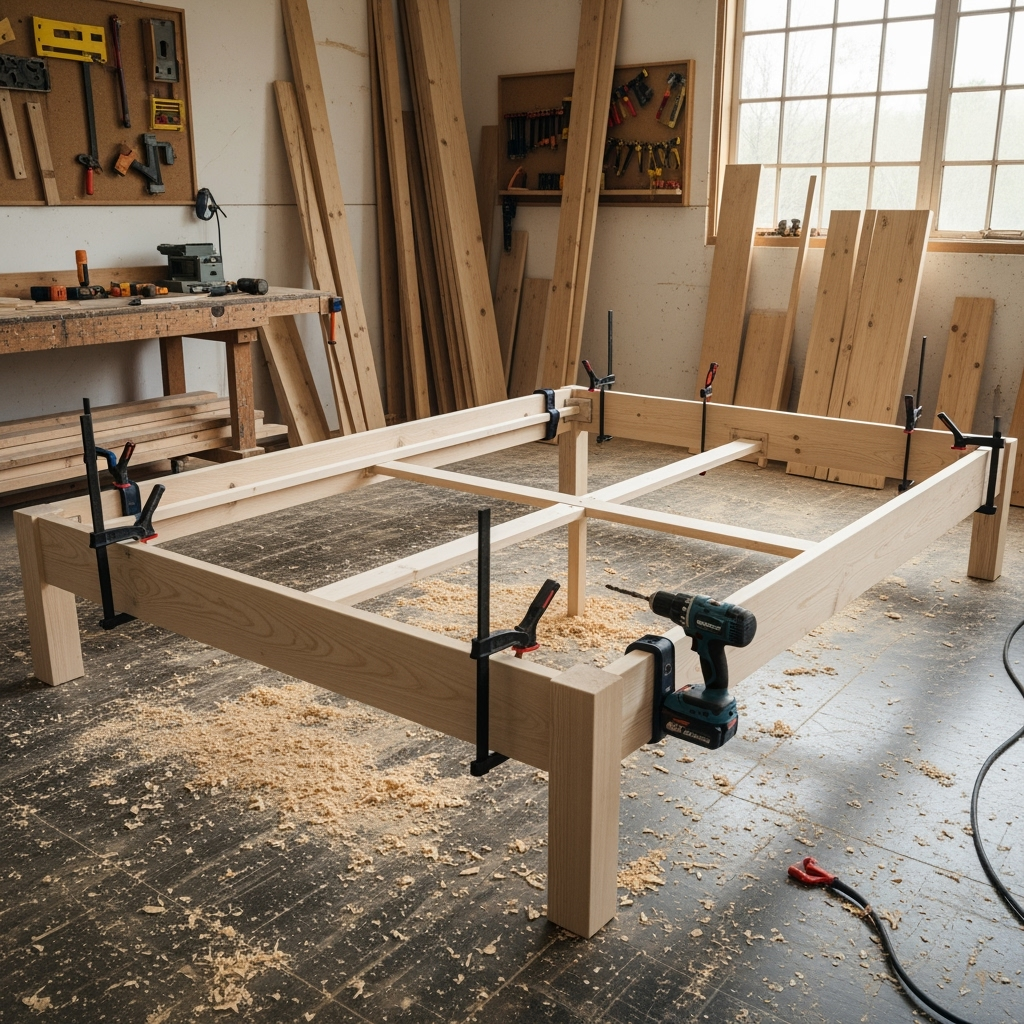
Assemble Your Frame: Screw-and-Glue Method to Eliminate Squeaks
This is where most DIY beds fail. Pocket holes alone flex over time. Here’s the proven two-step process for silent, rigid frames:
- Dry-fit all components with clamps. Verify corners are square (measure diagonals—they must match within 1/16″).
- Apply Titebond III waterproof glue to joints. Clamp tightly, then drill pilot holes through rails into posts.
- Insert screws while glue is wet. Wipe excess glue immediately with a damp cloth—dried glue blocks finish absorption.
Why this works: Glue fills microscopic gaps between wood fibers. When combined with screws, it creates a monolithic structure. After five years of nightly use, frames built this way show zero movement. Test stability by shaking the frame—no flex means no future squeaks.
Center Support Solutions: Prevent Sagging Under Heavy Mattresses

All-foam mattresses (like Casper) weigh 100+ pounds—enough to bow unstiffened frames. For queens/kings, install a center beam with dual legs:
- Cut a 2×6 beam to match your frame’s width (59.5″ for queens).
- Attach with two heavy-duty bed bolts through the side rails.
- Position legs 12″ from beam ends (not center—this creates weak leverage points).
- Critical: Angled 15-degree legs resist sideways force better than vertical ones.
No mattress slippage? Because cedar’s slight texture grips foam. If you have a bouncy hybrid mattress, add non-slip pads under corners—never glue rails to the mattress.
Secure Headboard Without Wall Damage: Two Foolproof Methods
Skip drilling into drywall with these hidden attachment systems:
Method 1: Bolt-On Bed Rails
- Attach L-brackets to the inside of headboard posts.
- Slide 18″ metal bed rails (sold at hardware stores) into brackets.
- Bolt rails to side rails using carriage bolts.
- Advantage: Disassembles in 60 seconds for moves.
Method 2: French Cleat System
- Cut a 45-degree wedge into the top of the headboard.
- Mount matching wedge to wall studs.
- Hang headboard by sliding wedge into cleat.
- Pro Tip: Wrap cleats in felt to prevent wall scratches.
Both methods keep headboards rock-solid. Test by pushing top corners—zero wiggle means secure installation.
Finish with Tung Oil: Protect Cedar and Highlight Natural Grain
Skip plastic-like polyurethane. Tung oil soaks deep into cedar’s pores, enhancing grain without hiding it. Here’s the three-coat process for silky-smooth protection:
- Sand sequentially: 80 grit (remove mill marks) → 120 grit (smooth surface) → 220 grit (buttery feel). Wipe dust with tack cloth.
- Apply oil: Flood surface with boiled tung oil. Let soak 20 minutes, then wipe all excess. Wait 24 hours.
- Repeat twice: Second coat deepens color; third adds water resistance. Between coats, lightly sand with 320 grit.
Why tung oil wins: It repairs itself. Spills? Sand the spot and re-oil—no patchy polyurethane bubbles. Reapply every 2 years to maintain protection. Avoid “cedar oil”—it’s a fragrance, not a finish.
Final Note: Your cedar bed frame isn’t just furniture—it’s a legacy piece. With screw-and-glue construction and tung oil’s natural defense, it’ll outlive cheap alternatives while filling your room with forest freshness. Sand and re-oil every few years, and this frame will support generations of restful sleep. Ready to expand your sanctuary? Build a matching cedar nightstand next using the same silent-assembly techniques.


