
That familiar creak every time you turn over? The unsettling wobble when you sit on the edge? A weak bed frame doesn’t just disrupt your sleep—it can ruin your mattress and create safety hazards. When your foundation fails, your entire sleep system suffers. But here’s the good news: how to make a bed frame more sturdy is simpler than you think. Most reinforcement projects take under 60 minutes with basic tools, transforming a rickety frame into rock-solid support. This guide cuts through the noise with battle-tested methods pulled straight from structural repair experts. You’ll learn exactly where to reinforce, what materials actually work, and how to add hundreds of pounds of extra capacity without replacing your entire bed.
Stop wasting money on temporary fixes. By targeting the five critical failure points we’ll cover, you’ll build a foundation that outlasts your mattress. Whether you’re dealing with a squeaky IKEA frame or a sagging antique, these techniques work for all bed sizes—from twin to California king. Let’s turn that wobbly nuisance into a silent, unshakeable sleep sanctuary.
Spot These 5 Critical Weak Points Causing Your Bed Frame Wobble
Before grabbing tools, pinpoint exactly where your frame fails. This 5-minute diagnostic saves hours of wasted effort. Start by checking the manufacturer’s weight rating—usually stamped on a leg plate or rail. If your combined weight (you + partner + mattress) approaches this number, reinforcement isn’t optional. Now, perform these specific checks:
Push Test: Find Hidden Flex Points in 60 Seconds
Stand beside your bed and push down firmly on each corner, then the center. A sturdy frame should feel immovable. If you detect bounce or hear creaks, note those locations. Pay special attention to where side rails meet the headboard—this junction fails in 80% of wobbly beds. For metal frames, feel for lateral “give” by shaking the headboard side-to-side. Any movement here means immediate reinforcement is needed.
Squeak Mapping: Locate Friction Zones Before They Fail
Lie on the mattress and shift your weight systematically: sit on the edge, roll side-to-side, bounce gently. Mark every squeak location with painter’s tape. Most noises originate from three trouble spots: rail-to-post joints, center beam connections, or slat supports rubbing against rails. For wooden frames, inspect joints for hairline cracks radiating from screw holes—a sure sign of imminent failure. Metal frames often squeak where brackets contact tubing; check for visible metal shavings indicating grinding.
Fix Loose Bed Frame Corners with Steel Angle Brackets
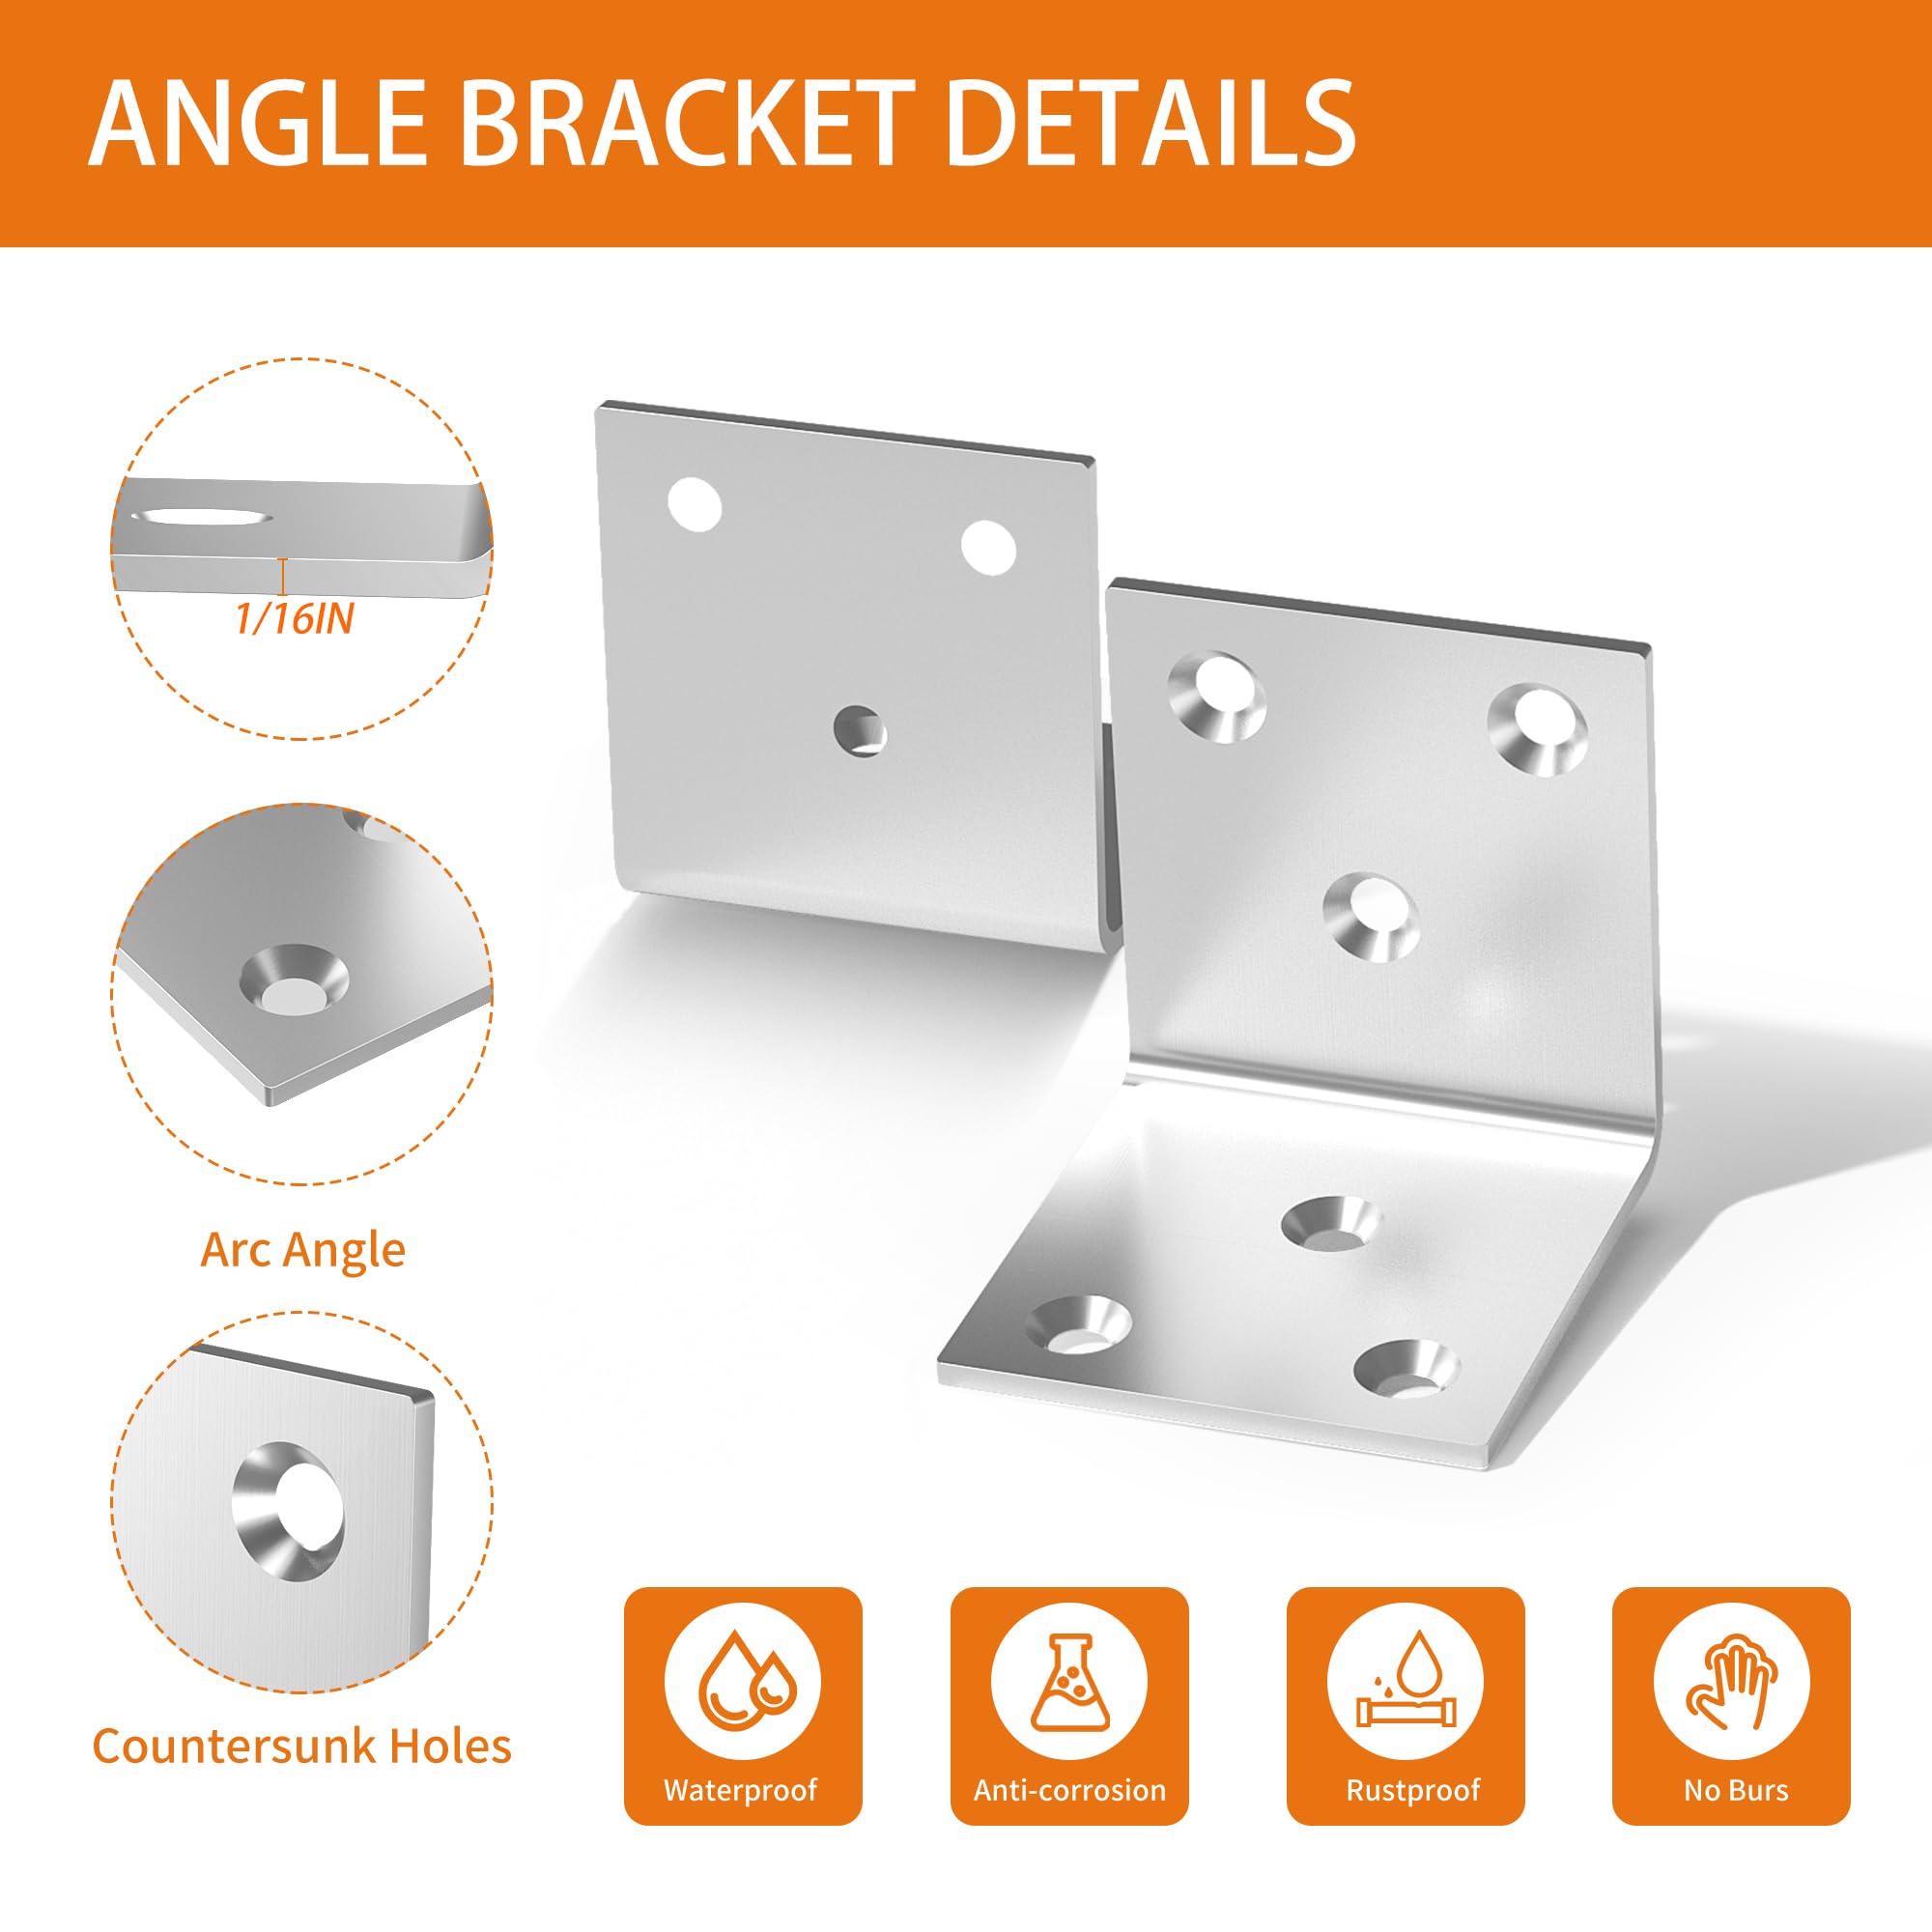
Loose corners cause 90% of bed frame wobble. Reinforcing these high-stress joints takes 15 minutes and costs under $10. Forget tightening original bolts—they’ve likely stripped the wood. You need structural reinforcement that locks the frame into a rigid rectangle.
Install Heavy-Duty L-Brackets in 3 Critical Locations
Remove the mattress and disassemble the corner where rails meet the headboard. Clean any sawdust from stripped holes. Position a 4-inch steel angle bracket inside the joint so one flange rides vertically along the headboard post and the other horizontally along the side rail. Drill pilot holes through both bracket flanges, then secure with 3-inch structural screws—not the original bolts. Repeat for all four corners. For extra security on queen/king frames, add a second bracket rotated 90 degrees to form a “corner cage.” This prevents the “parallelogram effect” that causes dangerous side-to-side sway.
Eliminate Wood-on-Wood Squeaks with Wax Lubrication
If disassembling isn’t possible, silence squeaks permanently without disassembly. Slide a candle wax stick or bar of soap along the seam where the rail slides into the headboard post. Work it deep into the joint with a putty knife, then reassemble tightly. The wax reduces friction while allowing wood expansion—no messy oils that attract dust. Test by shifting your weight; persistent squeaks mean you need full disassembly and glue reinforcement.
Add Center Support Legs to Stop Sagging in Queen and King Beds
Center sag is the silent mattress killer. Without proper mid-bed support, even heavy-duty frames fail under dynamic loads. That “hammocking” effect you feel? It’s destroying your mattress warranty. Here’s how to add professional-grade support:
Install Adjustable Center Legs Under High-Pressure Zones
For queen/king beds, position your heaviest sleeper (usually the center of the mattress). Place a 2×4 board perpendicular to the side rails exactly under this spot. Attach it to the rails with T-brackets, then screw an adjustable bed leg (like IKEA’s TROFAST) into the board’s center. Extend the leg until it barely touches the floor—never let it bear full weight. This “kicks” the frame upward, eliminating sag while allowing the side rails to carry the primary load. For king beds, add a second leg under the shoulder area—this targets the two highest-stress zones.
Upgrade to a 2×6 Center Beam for Maximum Strength
Replace flimsy factory center rails with construction-grade lumber. Cut a 2×6 to span head-to-foot inside your frame, laying it on its 5.5-inch edge for maximum rigidity. Secure both ends to the headboard/footboard with 4-inch lag bolts through steel mending plates. This single upgrade can double your frame’s weight capacity. Pro tip: Sand sharp edges and coat with mineral oil to prevent splinters if accessing under-bed storage.
Replace Weak Slats with a Solid Plywood Foundation
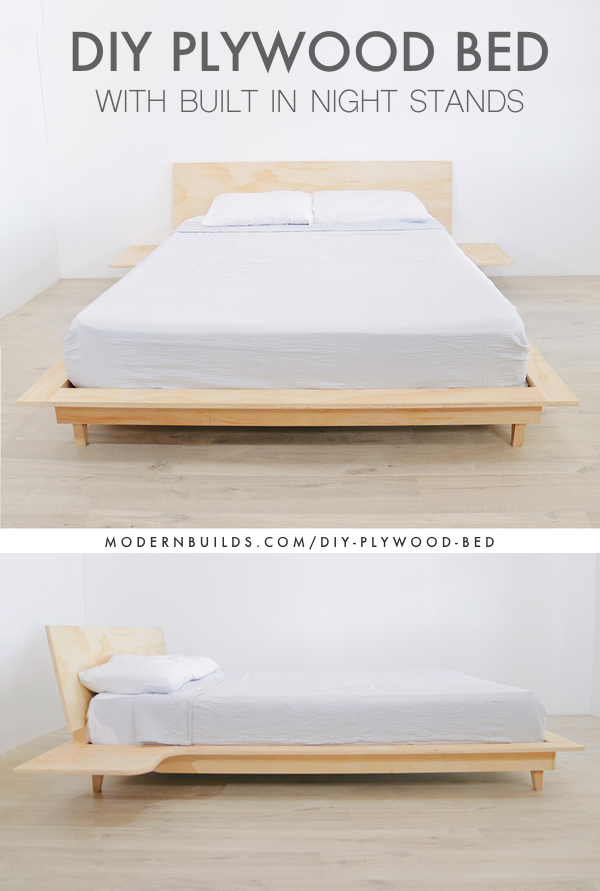
Flimsy slats are the #1 cause of premature mattress sag. Spaced more than 3 inches apart, they create uneven pressure points that deform memory foam and latex. The solution isn’t more slats—it’s eliminating flex points entirely.
Build a Ventilated Plywood Platform in 20 Minutes
Remove all slats and measure your frame’s interior dimensions. Cut 3/4-inch AC plywood to fit with 1/8-inch clearance on all sides (prevents binding during wood expansion). Drill 1-inch ventilation holes in a 6-inch grid pattern—this maintains airflow while adding structural rigidity. Place the platform directly on the side rails, ensuring no overhang. For extra security, screw through the rails into the plywood edges using 1.5-inch trim screws every 8 inches. This creates a monolithic foundation that distributes weight evenly, adding 300+ lbs of capacity.
Install Diagonal Cross-Bracing to Eliminate Side-to-Side Wobble

Lateral movement destroys frames faster than vertical loads. That side-to-side “shake” you feel when sitting on the edge? It’s working bolts loose with every movement. Cross-bracing transforms your rectangle into two rigid triangles—the strongest geometric shape.
Create an X-Brace for Metal Frames Using Steel Strapping
For tubular metal frames, cut two 16-gauge steel straps to run diagonally from headboard top corners to footboard bottom corners. Pre-drill holes at 6-inch intervals. Attach with self-tapping metal screws through rubber grommets to prevent metal-on-metal contact. The rubber isolates vibration while the steel prevents racking. Tighten straps until you see slight frame tension—like tuning a guitar string—but never enough to bow the frame.
Reinforce Wooden Frames with Hidden Diagonal Braces
Cut 1×3 pine boards to form a “Z” pattern along the frame’s underside. Attach the top brace from the headboard’s inside top corner down to the footboard’s mid-rail. Secure with 3-inch screws through steel corner braces at both ends. This hides the brace while adding immense rigidity—no visible hardware. For finished frames, stain the brace to match before installation.
Conduct a Final Rigidity Test and Prevent Future Issues
Your reinforcement isn’t complete until it passes real-world stress testing. Skip this step and you’ll miss hidden weaknesses that cause late-night failures.
Perform the 3-Stage Load Test Like a Professional
First, stand on the frame’s center with full weight—no bounce. Listen for creaks and watch for movement. Second, have two people sit on opposite edges simultaneously, rocking side-to-side. The frame should resist all lateral motion. Finally, lie down and shift positions aggressively. Any noise means revisit squeak points with wax lubrication. For heavy-duty assurance, place 50-pound sandbags on stress points overnight; check for permanent deformation in the morning.
Implement Quarterly Maintenance to Keep Your Frame Sturdy
Stability degrades over time. Every three months, perform these two critical checks: Tighten all structural screws (don’t overtighten into stripped wood), and inspect center legs for floor contact—carpet compression often creates gaps within months. For wooden frames, rub candle wax on all sliding joints during tightening to prevent future squeaks. Keep a digital level in your nightstand; place it on the frame quarterly to catch developing sag before it damages your mattress.
Reinforcing your bed frame isn’t about brute force—it’s strategic engineering at the molecular level. By targeting just five critical failure points with these proven techniques, you’ve transformed a liability into a fortress. That silent, immovable foundation you now have adds years to your mattress life while eliminating sleep-disrupting noises. Remember: true bed frame stability comes from layered reinforcements—corner brackets prevent wobble, cross-bracing stops racking, and solid platforms distribute weight. Don’t wait for the next creak to act. Grab your drill this weekend and build the unshakeable sleep foundation you deserve. For heavy mattress owners, consider pairing this with our guide on how to choose the best mattress for heavy people—because even the sturdiest frame needs compatible support. Sweet dreams start with a rock-solid base.


