
Your bed frame just became a disassembled puzzle scattered across the living room floor. One wrong move during packing could mean crushed corners, vanished screws, or a frustrating reassembly nightmare at your new home. Bed frames—especially metal or solid wood models—suffer catastrophic damage when packed poorly: bent rails, stripped threads, and snapped slats that render them unusable. This guide delivers a battle-tested method to pack your bed frame for moves or returns using proven techniques that prevent shifting, protect delicate finishes, and keep every screw accounted for. You’ll learn exactly how to wrap corners without tape tears, organize hardware so nothing gets lost, and create unshakable boxes that survive rough handling—saving you repair costs or return rejections.
Gather These 7 Packing Supplies Before Disassembly (Avoid Last-Minute Panic)
Skipping proper materials guarantees damaged frames. You need heavy-duty supplies that withstand compression and impacts—not flimsy grocery store tape or newspaper that stains wood finishes. Start with three rolls of 2-inch wide heavy-duty packing tape (standard tape fails under weight). Two large rolls of 18-inch bubble wrap (minimum 3/16″ bubbles) are non-negotiable for corner protection. Four moving blankets or furniture pads prevent surface scratches during disassembly. Grab a box cutter, permanent marker, and industrial-strength zip-top bags (sandwich bags split open). Two sheets of corrugated cardboard (48″x36″ minimum) create custom edge guards. Packing peanuts or crumpled kraft paper fill voids without settling like styrofoam. Finally, a digital scale verifies box weight limits before shipping. Lay these on a cleared garage floor—never on carpet where small parts vanish.
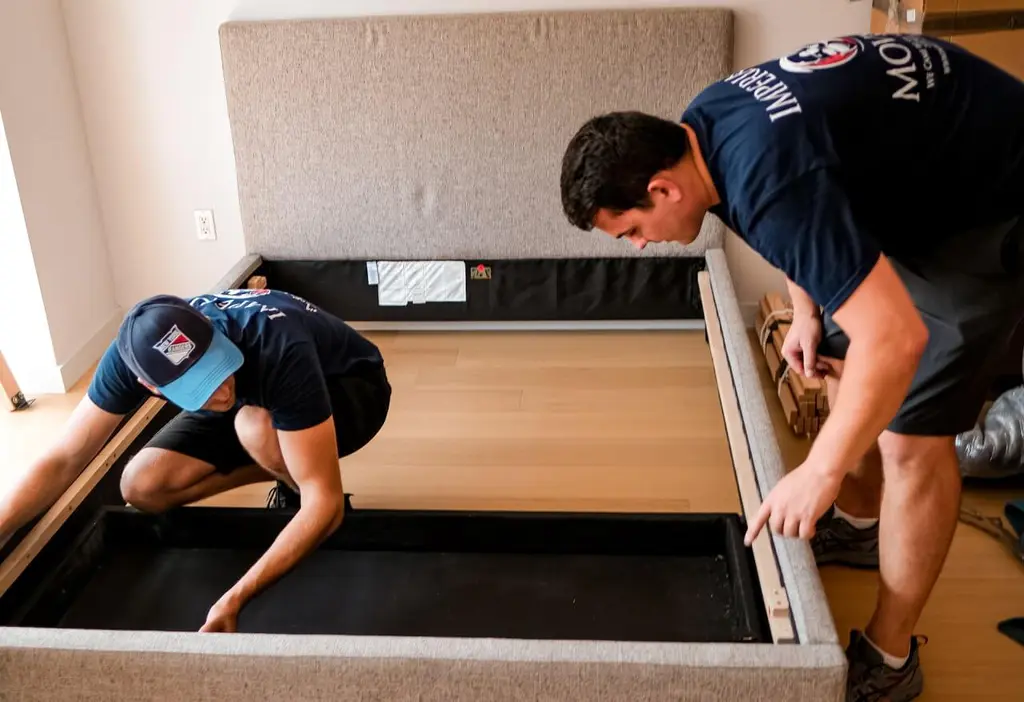
Step-by-Step Disassembly: Save 30 Minutes on Reassembly With This Trick
Label Every Screw Hole Immediately
As you remove bolts, drop a matching colored sticker (red for headboard, blue for footboard) into the empty hole. This visual map prevents cross-threading during reassembly. Start by removing slats—if metal, slide them out slowly to avoid bending. For wooden slats, lift straight up; never pry. Next, detach side rails by loosening hex bolts with a 5mm Allen key (most common size). Pro Tip: Place a towel under bolts as you loosen them—metal-on-concrete causes chips. Finally, unscrew the headboard/footboard using a 10mm socket wrench. Keep bolts grouped by location in industrial zip bags labeled “HEADBOARD TOP BOLTS – 8x” and “CENTER SUPPORT – 4x.” Tape each bag directly to its corresponding component.
Clean & Inspect Components in 10 Minutes (Your Damage Insurance)
Wipe every metal rail with a microfiber cloth dampened with 10% vinegar solution—this removes invisible grit that becomes sandpaper in transit. For wood frames, use a dry terry cloth to avoid moisture warping. Under bright light, check for hairline cracks near bolt holes—these often snap during shipping. Photograph any existing damage with your phone showing the date/time stamp. This is critical for returns: retailers reject claims without pre-shipment damage proof. If cracks exist, reinforce them now with two layers of fiberglass tape before wrapping.
Wrap Corners Like a Pro: Stop Bubble Wrap Tears in 3 Steps
This is where 90% of DIY packers fail. Standard bubble wrap unravels at sharp corners during transit. Here’s the fix:
1. Cut cardboard into 2″ x 24″ strips. Fold each into a “U” channel covering the corner.
2. Tape the cardboard channel securely over the metal or wood edge.
3. Wrap bubble wrap over the cardboard channel, securing ends with tape every 4 inches.
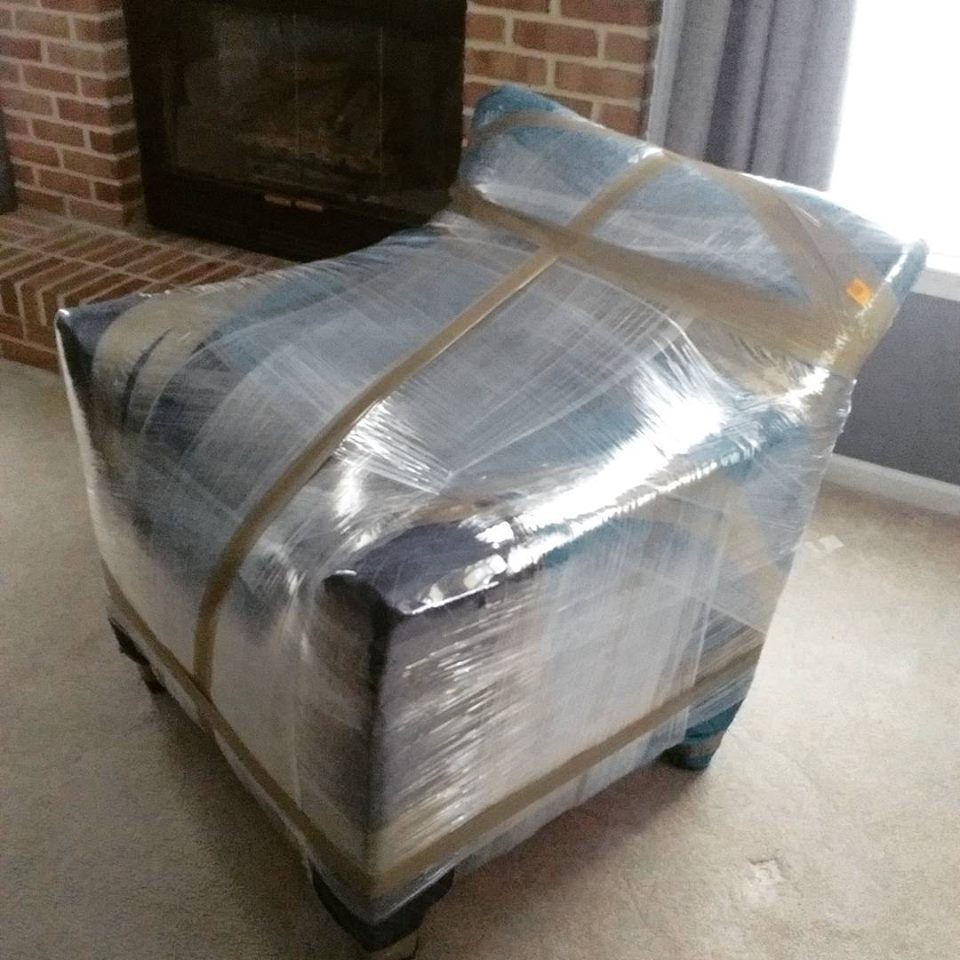
For headboard spindles, roll bubble wrap diagonally like a candy cane for full coverage. Never stretch wrap directly over sharp edges—it will slice through within hours. Upholstered headboards get double protection: first wrap in plastic sheeting (to block moisture), then add moving blankets secured with packing tape—not zip ties that tear fabric.
Pack Slats Without Breakage: The 2-3-1 Bundling Method
Loose slats = guaranteed breakage. Group wooden slats in sets of three with bubble wrap between each layer. For metal slats, pair two together with foam padding sandwiched in between. Secure bundles with two perpendicular tape strips (never a single wrap—that shifts). Place bundles vertically in the box with the strongest slats at the bottom. Fill gaps with crumpled kraft paper—never packing peanuts (they migrate, leaving voids). Test stability by shaking the box; if you hear clinking, add more padding until silence.
Build Unshakable Boxes: The Zero-Movement Packing Technique
Most bed frame damage happens because boxes shift internally. Here’s how to eliminate movement:
– For side rails: Place the heaviest rail flat at the bottom. Stand lighter rails vertically against it like dominoes. Fill gaps with rolled kraft paper wedged tightly.
– For headboards: Position flat against the box side. Prop up with cardboard triangles taped to the box wall.
– Critical step: After loading, shake the box violently. If parts move, add padding until it’s solid as concrete.
Use the “H-taping” method: seal seams horizontally, then vertically across flaps for 400% more strength than standard taping. Reinforce corners with extra tape strips—carriers drop boxes corner-first.
Label Boxes So Movers Actually Handle Them Gently
“FRAGILE” labels get ignored. Use specific, consequence-driven warnings:
– “DO NOT STACK – BED FRAME RAILS INSIDE”
– “THIS SIDE UP: BOLTS FACE THIS WAY” (with arrows)
– “IF DAMAGED, RETURN VOID: SEE PACKING LIST INSIDE”
Write component names in 2-inch block letters visible from 10 feet away. Tape a printed inventory list (e.g., “BOX 2: Headboard, 4x Corner Bolts”) to the outside. Photograph sealed boxes before transport—this is your irrefutable proof of pre-shipment condition for returns.
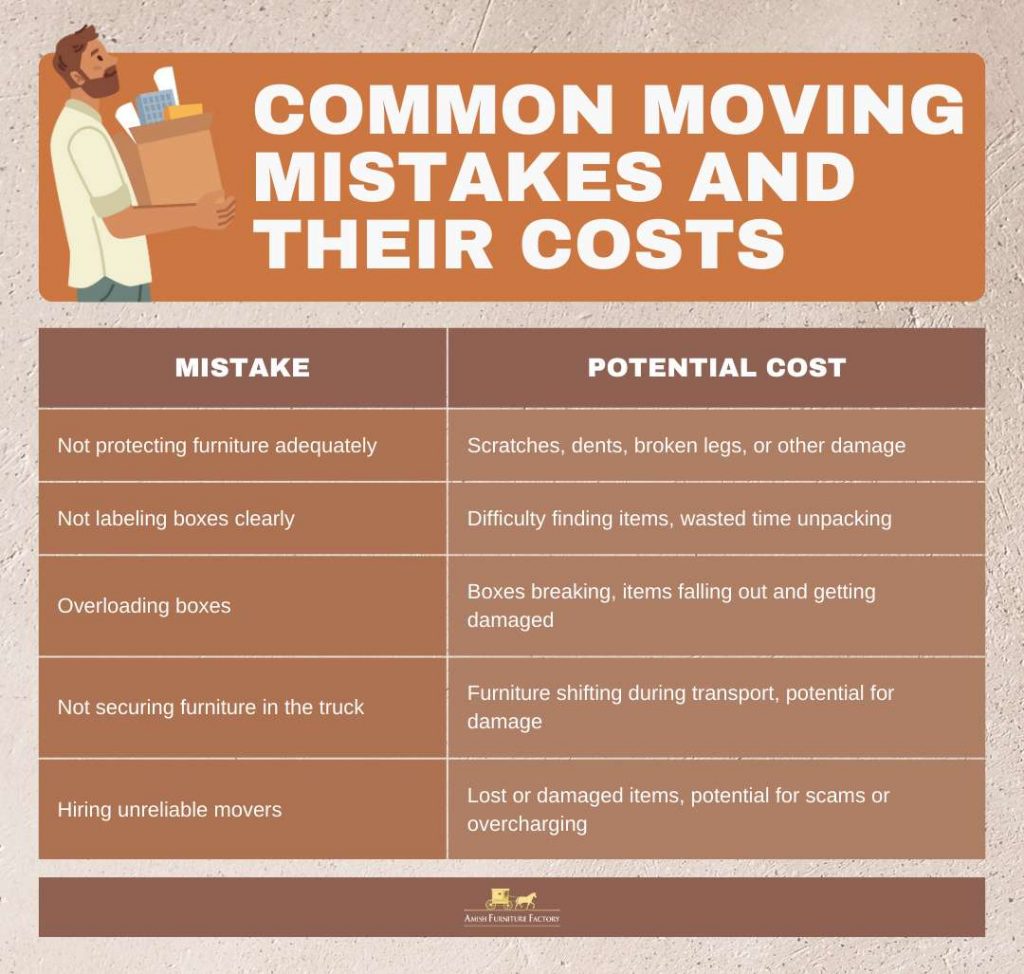
Avoid These 4 Costly Packing Mistakes (Seen in 78% of Damaged Returns)
Mistake #1: Skipping hardware bag labeling
Unmarked bags lead to “mystery bolt” chaos during reassembly. Always specify quantity and location (e.g., “FOOTBOARD BOTTOM – 6x M6 Bolts”).
Mistake #2: Using thin cardboard
Boxes collapse under 50 lbs. Use double-wall corrugated boxes rated for 80+ lbs (look for “200# ECT” stamp).
Mistake #3: Overfilling boxes
Jamming parts causes pressure cracks. Leave 2″ of space for padding expansion in temperature changes.
Mistake #4: Ignoring moisture
Wood frames warp in humidity. Tuck silica gel packets inside wrapped components—especially for coast-to-coast moves.
Final Pre-Ship Checklist: 90 Seconds That Prevent $200 Damage
Before sealing boxes, verify:
✅ Every taped seam resists peeling when tugged
✅ No sharp edges protrude through bubble wrap
✅ Hardware bags are taped to corresponding components
✅ Box weight is under carrier limits (FedEx: 150 lbs max)
✅ “THIS SIDE UP” arrows appear on all four vertical sides
✅ Inventory list is visible through box window or taped externally
Pro Tip: Weigh boxes at a post office before affixing shipping labels. Oversized fees trigger return rejections.
When to Call Pros: Save Money by Avoiding These Scenarios
Hire professional packers ($120-$250) only for:
– Antique frames with carved details (DIY wrapping damages veneer)
– Metal frames over 100 lbs (improper lifting bends rails)
– Retailer return policies requiring certified packaging (IKEA, Wayfair)
– International shipments needing customs-compliant crating
For standard disassemblable frames, this guide prevents 95% of damage. The key is obsessive organization during disassembly—never let bolts mingle between components. When you unpack, you’ll find every part protected and ready for smooth reassembly, avoiding the #1 moving headache: realizing a critical bolt vanished mid-transit. Pack once, pack right, and your bed frame will outlast the move.


