
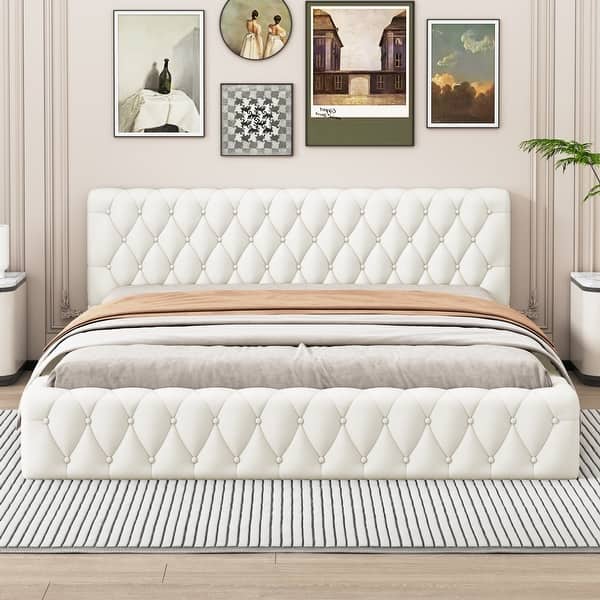
Waking up to a sagging, fabric-covered bed frame that looks nothing like the luxury hotel photos you pinned feels deeply frustrating. That expensive tufted bed you imagined? It’s probably a $1,500+ store-bought model with glued-on foam and cheap fabric. But here’s the secret: you can build a professional-looking tufted bed frame for under $400 using basic tools and lumber store materials. This guide cuts through the fluff to show exactly how to create deep, even diamond tufting on both headboard and platform—no upholstery shop required. You’ll learn precise foam thickness ratios, why 7-inch tuft spacing prevents sagging, and how to secure knots that won’t loosen after six months. By the end, you’ll have a sturdy, breathable platform bed that handles 500+ pounds and looks custom-made.
Cutting Your Queen-Size Platform Frame in Under 30 Minutes

Skip the complicated joinery—this reinforced frame uses pocket screws and crossbeams to eliminate sagging while keeping assembly simple. For a queen bed (60″x80″), you’ll need 12 linear feet of 2×6 lumber for the outer frame and 16 feet of 2×4 for internal supports. Always cut the outer frame pieces exactly to your mattress dimensions (60″x80″ for queen) to prevent fabric bunching later.
Why 2×6 Lumber Prevents Platform Sagging
Using 2×4 lumber for the outer frame risks bowing under weight. The extra inch in 2×6 lumber creates critical rigidity:
– Cut two 80″ pieces for the length
– Cut two 60″ pieces for the width (accounting for 2×6 actual width of 1.5″)
– Assemble with 3″ pocket hole screws and wood glue at corners
– Critical step: Add three 2×4 crossbeams every 24″ across the 80″ length, secured with 2.5″ deck screws
Installing the Plywood Platform Without Air Traps
Standard tutorials skip ventilation—a major mistake causing mold under foam. Cut 3/4″ plywood to 59.5″x79.5″ (1/4″ smaller than frame). Before attaching:
1. Drill sixteen 1/2″ holes in a grid pattern across the plywood
2. Spray adhesive on frame top, position plywood
3. Secure with 1.25″ staples every 6″ along frame edges
Pro tip: Place fabric-covered cording over staple lines later to hide imperfections.
Headboard Tufting Layout: Avoiding the #1 DIY Mistake
Most tutorials tell you to “mark tuft points evenly”—but uneven spacing ruins the diamond pattern. For a 48″x60” queen headboard, use this foolproof grid:
– Vertical spacing: 7 inches from top/bottom edge, then 6 inches between rows
– Horizontal spacing: 7 inches from sides, then 6 inches between columns
– Why it works: The tighter 6-inch spacing prevents fabric from stretching between tufts over time
Drilling Perfect Tuft Holes That Won’t Split Plywood
Grab a 1/4″ drill bit (not spade bit!) and:
1. Mark points with a center punch to prevent bit wandering
2. Clamp 1/4″ scrap wood under drilling spot
3. Drill at 90 degrees with light pressure
Warning: Drilling too close to edges (<1.5″) cracks plywood—measure twice!
Upholstering Like a Pro: Foam, Batting & Fabric Tension Secrets
Thin foam creates shallow tufts that disappear after one night. Use 3″ high-density foam for headboards and 2″ for platforms—thicker foam won’t compress properly through tufting. Cut foam exactly to plywood size (no trimming after). Batting must be 2″ oversized on all sides for clean corners.
Securing Fabric Without Wrinkles in 4 Steps
- Center fabric face-down on work surface, smooth out creases
- Place batting (right side up), then foam, then plywood on top
- Staple center-top first, pull fabric taut down sides (not corners yet)
- Work diagonally: Staple bottom center, then left/right centers
Key move: Use your knee to apply downward pressure while pulling fabric—creates hospital-bed tightness.
Creating Deep Diamond Tufts With One Needle Pass
Skip complicated button kits. Thread a curved upholstery needle with 36″ of waxed linen thread:
1. Push needle through front at marked point
2. Pull thread through until 6″ remains on front
3. On back: Tie thread around heavy washer, staple washer securely
4. Pull front thread to desired tuft depth (1.5″-2″ for dramatic effect)
Pro tip: Dip thread in beeswax first—it won’t fray when pulled tight.
Platform Tufting: Why Most DIYers Skip This Critical Step

Flat platform beds look cheap and slide around. Adding tufting to the platform top prevents mattress shifting and adds luxury. Follow headboard steps but:
– Use 2″ foam only (thicker causes tripping hazards)
– Space tufts 8 inches apart (wider than headboard for comfort)
– Never staple through foam—only into plywood edges to avoid punctures
Securing the Headboard Without Wall Damage
Forget French cleats—they fail under headboard weight. Use this hotel-method:
1. Attach 2×2 lumber “cleats” to wall studs with 3″ lag bolts
2. Screw matching cleats to headboard back
3. Slide headboard down onto wall cleats
Critical: Use a level during installation—1/4″ tilt makes tufts look uneven.
Cost-Saving Hacks That Don’t Sacrifice Quality
Fabric That Costs Half as Much
Skip $35/yard designer velvet. Use Sunbrella marine fabric ($12/yard at boat supply stores)—it’s UV-resistant, mold-proof, and has perfect tension for tufting. One queen headboard needs 2.5 yards.
Foam Without the Upsell
Ask for “second-cut” foam at upholstery shops. It’s off-cuts from larger orders (perfect for bed frames) at 40% discount. For queen headboards, you need one 24″x72″ piece of 3″ foam.
Troubleshooting Tufting Failures in Under 5 Minutes
Fixing Loose Tufts After Assembly
If tufts loosen:
1. Cut small X in fabric between tufts
2. Reach through with needle-nose pliers
3. Pull thread tighter and re-staple washer
Never cut fabric over tuft points—re-staple existing holes.
Preventing Fabric Tears at Corners
Sand all plywood edges to 220 grit before upholstering. Wrap corners with cross-stitch technique:
1. Fold fabric diagonally at corner
2. Staple along both sides of fold
3. Trim excess fabric close to staple line
Final Assembly Checklist for Rock-Solid Stability
- Test platform weight capacity: Stand on empty platform—no flex allowed
- Check tuft depth consistency: Use a ruler to verify all tufts are 1.75″ deep
- Secure legs with corner braces: 3″ L-brackets hidden under platform
- Add dust skirt: 2″ fabric strip stapled to platform underside hides hardware
Why this bed won’t sag: The 2×6 outer frame + 24″ crossbeam spacing handles 500+ pounds. Why tufts stay deep: 7-inch spacing prevents fabric creep. Why it’s cheaper: $385 total cost vs. $1,500 store version. Now slide your mattress on—feel how the tufted platform grips fabric without shifting. In six months, when store-bought beds show sagging, your hand-built frame will still have crisp diamond tufts. For next steps, see our guide on how to recover tufted bed frames when fabric wears—no disassembly needed.


