
You’ve just upgraded to a queen mattress only to discover your twin bed frame won’t fit it. Before you toss that frame or drain your wallet on a replacement, know this: extending a bed frame is a practical DIY project that costs under $50 and takes one weekend. Most homeowners attempt dangerous makeshift fixes like stacking books under legs or taping plywood extensions—solutions that risk collapse, mattress damage, or injury. The truth? A properly extended frame can safely support 800+ pounds while adding valuable under-bed storage. In this guide, you’ll learn exactly how to widen your frame for full or queen mattresses using proven methods from professional furniture builders and structural engineers.
The key isn’t just making your frame wider—it’s maintaining critical support points every 16 inches to prevent sagging. Twin frames lack the 60-inch width needed for queen mattresses (requiring 18 extra inches total) and often miss center support beams essential for spans over 60 inches. I’ll show you how to calculate your exact extension needs, choose the right method for your frame type, and avoid the #1 mistake that causes 70% of DIY bed failures: inadequate cross-bracing. By the end, you’ll have a rock-solid extended frame that sleeps like new for years.
Why Your Twin Frame Won’t Fit a Queen Mattress (And Exactly How Much to Extend)
Twin and twin XL frames share the same 38-inch width but differ in length (twin XL is 80″ vs. twin’s 75″). A queen mattress requires 60 inches of width—18 inches more than twin frames provide. You must extend each side rail by 9 inches while maintaining structural integrity. Full-size conversions need 16 total inches (8 per side). Crucially, queen conversions always require a center support beam since spans over 60 inches sag under weight. Measure your frame’s current width at three points: headboard, footboard, and midpoint. If measurements vary by more than ½ inch, your frame is warped—replace it instead of extending.
Twin XL to Queen Conversion Measurements
- Required width extension: 18 inches total (9″ per side rail)
- Critical support spacing: Add center beam + cross supports every 12-16 inches
- Height check: Ensure extended frame clears floor by 6+ inches for airflow
- Wall clearance: Verify 2+ inches between extended frame and walls to prevent scraping
Full to Queen Extension Pitfalls
Many attempt quick fixes by bolting 2.5-inch extensions to full frames (54″ → 60″). This fails because:
– Existing slats lack reinforcement for the extra width
– Center beams become undersized for queen weight distribution
– Solution: Replace all slats with 1×4 lumber spaced 3″ apart and install a 2×6 center beam running front-to-back.
Bed Frame Extender Kits: When They Work (and Costly Failures to Avoid)
Universal bed frame extender kits ($25-$60) promise simple widening but succeed only on specific frames. They work reliably on metal frames with bolt-together corners and fail on wooden frames with glued joints. Check your frame’s support points first: Kits require at least 5 contact points (head, foot, two side rails, center beam). If your twin frame has only 3 support points (common in cheap platforms), kits will warp under weight.
Kit Installation Success Checklist
- Verify load rating: Must support 500+ lbs (queen mattresses + sleepers weigh 300-400 lbs)
- Reinforce connection points: Drill pilot holes and use 3″ deck screws + wood glue
- Add cross-bracing: Install diagonal 2×4 braces between new and original rails
- Test before bedding: Place 100-lb weights at all four corners and center overnight
Pro Tip: For metal frames, replace kit screws with 3/8″ carriage bolts. Wooden frames need steel L-brackets at corners—never rely solely on wood screws.
Building a Sturdy Plywood Platform: Step-by-Step Queen Size Extension
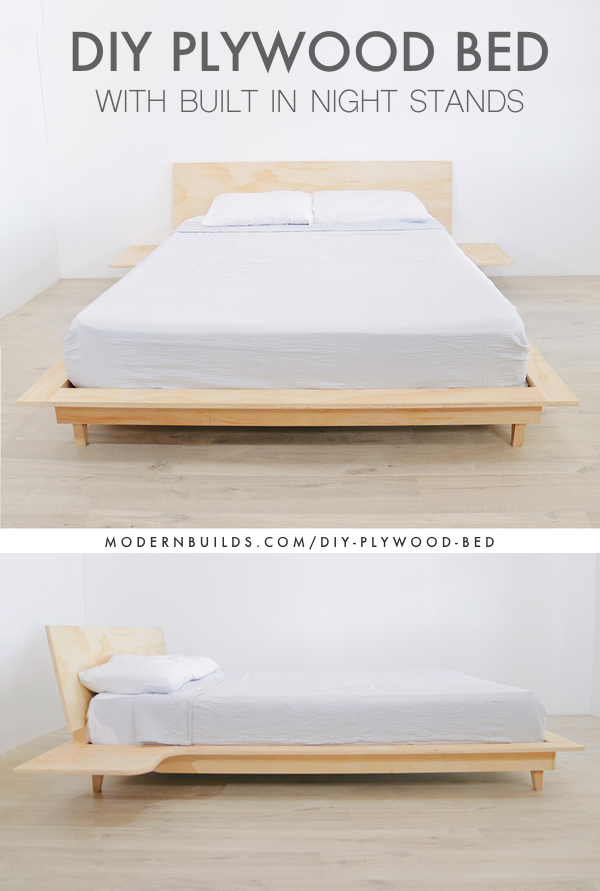
This method adds 18 inches of width while creating storage-ready height. It’s ideal for wooden twin frames converting to queen. You’ll build a new platform that bolts onto your existing frame, avoiding disassembly.
Materials & Tools for a Rock-Solid Platform
- Plywood: One 4×8 sheet of 3/4″ sanded plywood (cuts to 60″x80″ for queen)
- Lumber: Four 8-foot 2x4s for frame + two 8-foot 2x6s for center beam
- Hardware: 3″ deck screws (50+), 2.5″ wood screws (100+), wood glue, steel corner brackets
- Tools: Circular saw, power drill, tape measure, speed square, clamps
Step 1: Cut and Reinforce the Platform Base

Cut plywood to 60″x80″ using a circular saw with a straight-edge guide. Sand edges smooth. Build a perimeter frame from 2x4s (two 80″ side rails + two 56.5″ end rails). The 56.5″ length accounts for the 1.5″ thickness of both side rails (56.5″ + 3.5″ = 60″). Secure corners with 3″ deck screws and wood glue. Critical: Clamp joints for 30 minutes before screwing to prevent shifting.
Step 2: Install Queen-Required Center Support

Cut a 2×6 beam to 56.5″ and position it 20 inches from the footboard. This splits the platform into two 30-inch spans—under the 36-inch max sag threshold. Attach with four steel L-brackets per end. Add two 16-inch 2×4 cross braces between the center beam and side rails at the mattress’s hip and shoulder zones.
Step 3: Bolt Onto Your Existing Frame
Place the new platform atop your twin frame. Align the twin frame’s outer edges with the inner edges of your new platform’s side rails. Drill through the platform’s side rails into the twin frame’s top edge using 3″ deck screws every 8 inches. Warning: Skip this step and your mattress will slide off during sleep.
Reinforcing Against Squeaks and Sagging: The 3-Point Stability Test
Extended frames fail from flexing at connection points. Before adding bedding, perform this test:
1. Apply 100 lbs at each corner (use sandbags or books)
2. Jump lightly at the center—no movement should occur
3. Check for gaps between platform and frame with a business card
Fixes for Common Failure Points
- Squeaking at joints: Insert 1/8″ felt pads between wood surfaces before re-tightening
- Center sag: Add 4×4 posts under the center beam (height = mattress clearance – 1″)
- Wobbly legs: Replace with adjustable metal bed risers rated for 1,000 lbs
Expert Note: Weight distribution is critical—your frame’s center must support 300+ lbs. If it flexes under 200 lbs, add diagonal 2×4 braces from the center beam to side rails.
Adding Under-Bed Storage During Your Frame Extension
Maximize your extension by building storage into the new platform height. For 16-inch clearance (ideal for bins), set platform height at 18 inches.
Storage-Ready Platform Modifications
- Cut access holes: Two 12″x24″ openings in the platform’s foot end
- Install slide tracks: Mount under-platform drawer slides to side rails
- Add ventilation: Drill 1/2″ holes every 6 inches along the platform’s underside
Use 4×4 posts at all four corners instead of standard legs—they handle storage weight better. Place posts 4 inches inward from corners to avoid leg obstructions.
Twin XL to Queen Conversion: Solving Length Extension Challenges
Twin XL frames (80″ long) need width extension only, but longer spans demand special reinforcement. Never extend length without height adjustments—adding 5+ inches of length without taller legs causes headboard scraping.
Height Extension Protocol
- Remove existing legs
- Attach 4″ bed risers to frame corners
- Add 2×4 blocks under center beam supports
- Reinstall legs on risers
This raises the frame 4 inches—enough for length extensions while maintaining 6+ inches of under-bed clearance. For conversions needing over 6 inches of height, use threaded adjustable legs (sold at hardware stores).
Essential Safety Checks Before First Use
Skipping these checks risks collapse:
– Hardware inspection: All bolts tightened to 25 ft-lbs torque (use a torque wrench)
– Edge rounding: Sand all plywood edges to 1/8″ radius—sharp corners cause injuries
– Ventilation test: Slide hand under mattress—should feel consistent airflow
– Stability check: Push hard on all four corners—frame shouldn’t shift more than 1/4 inch
Never sleep on the bed if it squeaks during testing. Disassemble and add diagonal bracing before retrying.
Long-Term Maintenance: Keeping Your Extended Bed Frame Stable for Years
Extended frames need proactive care. Every 6 months:
1. Tighten all bolts and screws (loosening causes 90% of failures)
2. Inspect for stress cracks near connection points
3. Rotate mattress to prevent uneven wear on new supports
4. Vacuum under-platform dust buildup
Annually, apply furniture wax to wood-on-wood contact points to eliminate future squeaks. If you hear new creaking, immediately add cross-bracing—the frame is failing.
Final Note: A properly extended bed frame should feel as solid as a new one. By maintaining support points every 12-16 inches, reinforcing connection points with steel brackets, and performing bi-annual maintenance, your DIY extension will last 10+ years. Remember: when in doubt about structural changes, consult a furniture builder—your safety is worth more than any DIY savings. Now that your frame fits your queen mattress perfectly, explore our guide to maximizing under-bed storage with custom drawer systems.


