
You’ve just unboxed your new Helix bed frame and now face the critical question: how to assemble it correctly without frustration? A poorly assembled bed frame can lead to annoying creaks, uneven mattress support, and even safety hazards—problems that could turn your dream sleep setup into a nightmare. The good news is that Helix bed frames are designed with straightforward assembly in mind, typically taking just 30-60 minutes with the right approach. This guide delivers exactly what you need to transform that box of parts into a sturdy, reliable foundation for restful nights—no prior furniture assembly experience required.
Most people make the same critical mistake when assembling a Helix bed frame: rushing through the unboxing process without properly identifying components. This oversight often leads to discovering missing parts halfway through assembly or accidentally installing components backward, forcing frustrating disassembly. By following our precise sequence, you’ll avoid these common pitfalls and create a bed frame that provides stable, silent support for years. Whether you’re assembling a twin, full, queen, or king Helix frame, these proven techniques will ensure professional results every time.
Your Helix Bed Frame Unboxing Checklist: Tools and Workspace Setup
Before touching any hardware, create a dedicated assembly zone with at least 20% more space than your bed’s footprint. Clear a section of your bedroom floor near the intended location, laying down a blanket or cardboard to protect both your flooring and the frame components. This strategic positioning prevents the exhausting task of moving your fully assembled frame across the room later—a mistake that damages both floors and your back.
Essential tools you’ll need:
– Included Allen/hex key (typically 4mm or 5mm)
– Rubber mallet (for slat installation on some models)
– Phillips screwdriver (as backup for tight spaces)
– Measuring tape (for center support alignment)
– Second person (non-negotiable for queen/king sizes)
Immediately upon opening the box, inspect all foam-wrapped components for shipping damage. Pay special attention to the ends of side rails where impacts commonly occur during transit. If you notice cracks or significant dents, document with photos before proceeding and contact Helix support—attempting to assemble damaged parts creates safety risks. While the Helix frame typically arrives in one box, larger sizes may include a separate slat package; verify both are present before discarding packaging.
Helix Bed Frame Parts Identification: Finding Every Screw and Rail
Lay out all components in logical groupings: side rails together, center beams separate, and hardware sorted by size. The Helix frame’s modular design means similar-looking parts might have subtle differences—side rails often feature pre-drilled holes only on specific edges. Rotate each piece to locate orientation markings (small arrows or model numbers etched near connection points) that indicate proper positioning. Ignoring these markers leads to backward assembly that requires complete disassembly to fix.
Critical hardware identification tips:
– Longer bolts (3-4 inches): Connect center beam to side rails
– Medium bolts (2-3 inches): Secure headboard/footboard
– Short screws (1-2 inches): Attach slats to frame
– Rubber-tipped legs: Always go on center support beam
Count every piece against the instruction manual’s parts list before proceeding. Helix typically includes 10-15% extra small hardware pieces as spares, but major components like side rails or center beams have no duplicates. If anything’s missing, don’t substitute hardware—contact Helix immediately with your order number. While sorting, place small washers and nuts in separate containers (muffin tins work perfectly) to prevent rolling losses during assembly.
Assembling Helix Side Rails and Center Support in 15 Minutes
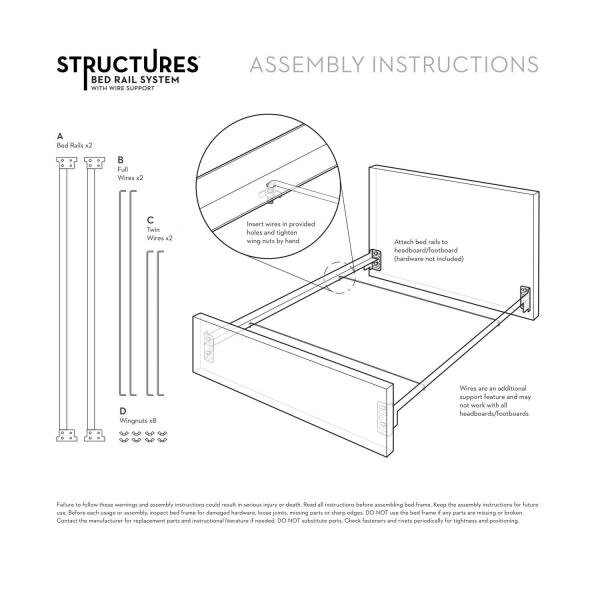
Position both side rails parallel on your workspace with orientation markings facing up. For queen and king sizes, identify the rail with additional pre-drilled holes for center support legs—this becomes the foot-end rail. Lay the center support beam perpendicular between them, aligning its bolt holes with those on the side rails. Many DIYers mistakenly install this beam upside down; look for manufacturer logos or smooth finishes that should face upward.
Follow this exact sequence:
1. Insert longer bolts through side rail holes into center beam
2. Hand-tighten nuts on opposite ends first to maintain alignment
3. Progress toward the center, tightening incrementally (¼ turn at a time)
4. Finish with full tightening using the hex key—stop when resistance increases significantly to avoid stripping wood threads
For king-size frames, attach the secondary center beam now following identical steps. This dual-beam system prevents the sagging that plagues single-beam king frames. When properly installed, the center beam should sit perfectly level with the side rails—any gap indicates misaligned bolt holes that require complete disassembly and repositioning.
Attaching Helix Bed Slats for Optimal Mattress Support
Helix slats either install as individual wooden planks or a continuous roll system. For individual slats, begin by securing the head and foot pieces first—these anchor points ensure proper spacing. Work toward the center, inserting each slat into the side rail grooves with the curved support side facing up. The natural arch distributes weight evenly, preventing the flat-spot sagging that occurs with incorrect orientation.
Critical spacing technique:
– Maintain 2-3 inch gaps between slats
– Use a smartphone width as a consistent spacer
– Never force slats—they should slide in smoothly
– Double-check alignment by sighting down the frame’s length
On roll-style frames, unroll the fabric backing toward the foot of the bed, ensuring the wooden slats remain perpendicular to the side rails. Some models require light tapping with a rubber mallet to seat slats fully into rail channels. Test each slat by pressing down firmly—properly installed slats won’t pop out or shift position. This step is non-negotiable for mattress warranty compliance; improper slat spacing voids most premium mattress guarantees.
Securing Headboard and Footboard Without Wobble

Position the headboard against your wall with mounting brackets facing outward. Have your assistant lift the frame’s head end onto the headboard’s support legs, aligning the pre-drilled holes within ¼ inch. This is where most assembly fails—rushing this alignment creates permanent wobble. Use a level to verify vertical positioning before inserting bolts, as even 2 degrees of tilt causes instability.
Insert medium-length bolts through the frame rails into headboard brackets, tightening incrementally in a star pattern (top left → bottom right → top right → bottom left). This distributes pressure evenly, preventing frame warping. After initial tightening, have your assistant apply downward pressure on the headboard while you complete tightening—this eliminates hidden gaps that cause creaking. Finally, test stability by shaking the headboard side-to-side; any movement means you must disassemble and realign.
Center Support Adjustments for Queen and King Sizes
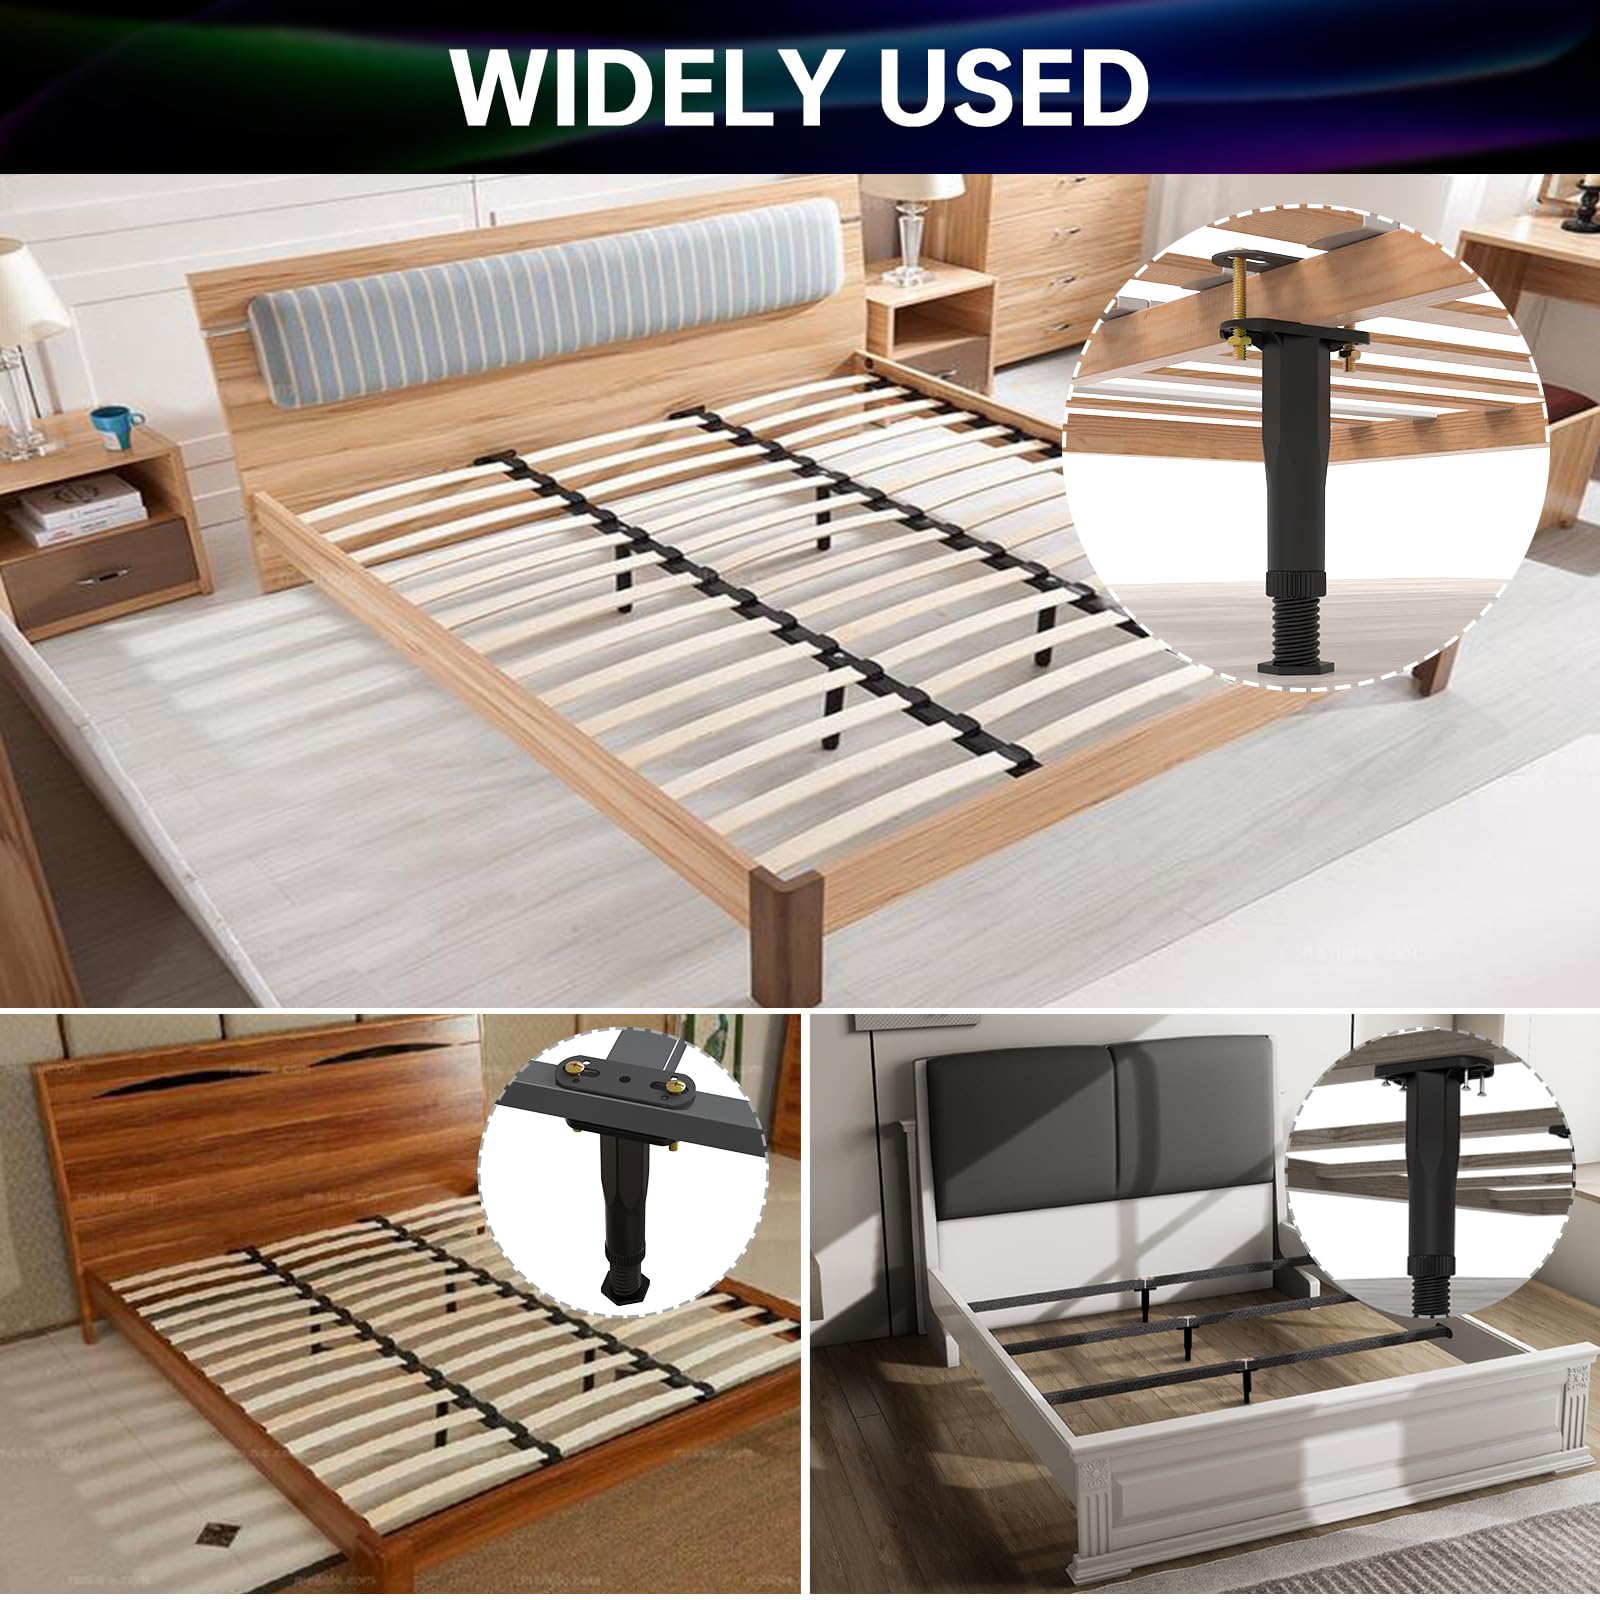
Queen and king Helix frames require precise center leg adjustment to prevent middle sagging. With the frame standing upright, measure the distance from the center beam’s underside to your floor at both ends and the middle. The center leg should be ¼ inch shorter than your average measurement to ensure proper tension without over-compressing the wood.
King-size dual-leg technique:
1. Position first leg 12 inches from the frame’s center
2. Place second leg 12 inches on the opposite side
3. Adjust both to identical heights using a tape measure
4. Verify levelness with a spirit level across the center beam
Apply weight to the center beam and listen for creaks—these indicate uneven pressure points requiring micro-adjustments. Properly adjusted legs should make firm contact but not bow the center beam upward. This seemingly small detail extends your frame’s lifespan by 3-5 years compared to improperly adjusted supports.
Final Safety Checks That Prevent Costly Mistakes
Before adding your mattress, perform these critical stability tests:
– The shake test: Apply firm pressure to all four corners and the center—no movement should occur
– The creak check: Press down on each slat while listening for unusual sounds
– The leg test: Ensure all support legs make full contact with the floor (place paper beneath—if you can pull it out easily, adjust the leg)
– The bolt inspection: Run your hand along all connections to feel for protruding hardware
– The level verification: Place a level on multiple slats to confirm even support
Tighten any bolts that have loosened during testing, but never overtighten—wood threads strip easily after initial installation. If using a memory foam mattress, place a breathable fabric liner over the slats to prevent direct wood contact while allowing airflow. For hybrid or innerspring mattresses, this step isn’t necessary as coils distribute weight effectively across the slat system.
Your Helix bed frame is now ready for years of silent, stable support. For ongoing maintenance, check bolt tightness quarterly and flip slats annually to ensure even wear. Should you ever need to disassemble for moving, follow this guide in reverse sequence—keeping hardware organized prevents the most common reassembly frustrations. With proper setup, your Helix frame will deliver the solid foundation your mattress deserves, night after restful night.


