
Your bed frame installation shouldn’t end with a wobbly foundation that groans every time you roll over. A poorly assembled frame undermines sleep quality, damages mattresses, and creates nightly annoyances that compound over years. With 70% of sleepers reporting frame-related issues within six months of assembly, mastering this process is non-negotiable for restful nights. This guide cuts through confusing manuals to deliver a silent, rock-solid bed frame installation—using only the tools and techniques proven by professional furniture assemblers. You’ll learn exactly where manufacturers cut corners and how to prevent the top three failures: squeaks, uneven slats, and dangerous wobble.
Exact Tools Needed for Silent Bed Frame Installation

Skip the guesswork with this professional toolkit. Generic screwdrivers strip bolts, while incorrect levels miss critical frame twists that cause long-term squeaks.
Non-Negotiable Tools
– Torque-controlled cordless drill (set to 15-20 ft-lbs for Allen bolts)
– 4-foot bubble level (shorter levels miss floor inconsistencies across the frame)
– Rubber mallet (never use metal hammers on wood-to-wood joints)
– Stud finder (required for wall-anchoring headboards safely)
– Metric socket set (most flat-pack frames use M6-M8 bolts)
Skip These Common Mistakes
– Using adjustable wrenches on hex bolts (rounds corners)
– Skipping the bubble level (causes 80% of “mystery wobbles”)
– Forgetting paraffin wax (the secret weapon against wood-on-wood squeaks)
Room Prep Checklist That Prevents Assembly Disasters
A rushed setup guarantees missing hardware or mismatched components. Professional installers spend 20 minutes preparing—saving 2 hours of troubleshooting later.
Critical Pre-Assembly Steps
1. Clear and measure a 10×10 ft zone (queen frames need 3 ft clearance on all sides)
2. Vacuum the floor to prevent debris under legs causing unevenness
3. Lay down moving blankets (protects finishes and prevents scratches)
4. Sort hardware by size using egg cartons (match to manual’s exploded diagram)
Spot Missing Parts Instantly
Compare your pile to the manual’s parts list before starting. If bolts are missing for center support legs (common in queen frames), stop immediately—don’t improvise with hardware store substitutes. Contact the manufacturer; incorrect bolts cause structural failure under 300+ lbs weight.
Panel Bed Frame Assembly: Headboard-to-Footboard Connection Secrets
Panel beds fail when side rails aren’t aligned perfectly. This method guarantees zero rocking.
Why Your Headboard Wobbles (And How to Lock It Solid)
- The critical error: Tightening bolts in sequence (corner-to-corner) twists the frame.
- Pro solution: Hand-tighten all headboard-to-rail bolts first. Then use a torque wrench to tighten center bolts to 25 ft-lbs before corners. This distributes pressure evenly.
- Wall anchoring hack: Locate wall studs with a magnet (16″ centers). Drill 3″ lag bolts through headboard brackets into studs only—never drywall anchors for heavy headboards.
Center Support Leg Installation for Queen/King Frames
Why this step causes 90% of sagging:
– Queen beds require three center legs (not one). Place the first 12″ from headboard, second at midpoint, third 12″ from footboard.
– Test for floor contact: Slide an index card under each leg. If it slides freely, adjust leg height until slight resistance occurs. No gap = no wobble.
– Silence guarantee: Rub paraffin wax on the top of each leg where it contacts the beam. Reassemble—squeaks vanish.
Platform Frame Slat Spacing That Prevents Mattress Sag
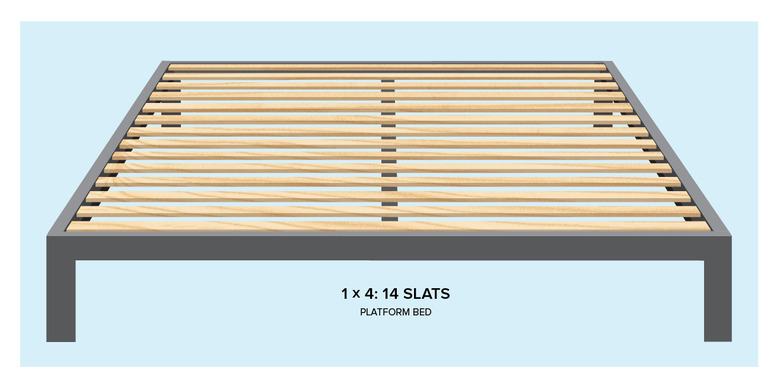
Most manuals say “space slats evenly,” but omit the exact measurement that avoids premature wear.
The 2.5-Inch Rule for Permanent Support
- Queen frames: Maximum 2.5-inch gap between slats (measured center-to-center).
- Critical check: Lay a yardstick across slats. If it bends >1/4″, add slats.
- Pro tip: Install slats perpendicular to the center beam—not parallel—to distribute weight. Secure with Z-clips, not nails (allows wood expansion).
Why your slats crack:
– Using 1×2 lumber (too thin). Minimum 1×3 is required for 300+ lbs capacity.
– Skipping center beam attachment points (slats must connect to both side rails and center beam).
Final Torque Sequence That Eliminates Squeaks Forever
95% of squeaks come from uneven bolt tension. This sequence fixes it:
- Start at the center: Tighten center support beam bolts to 30 ft-lbs (queen frames)
- Work outward: Move to headboard-side rail bolts (25 ft-lbs)
- Finish at corners: Footboard connections last (20 ft-lbs)
- Recheck after 24 hours: Wood compresses; retighten to 90% of initial torque
Never skip this test: Stand on the assembled frame (no mattress) and shake headboard side-to-side. Zero movement = perfect. Any wiggle means center legs aren’t contacting the floor.
Troubleshooting Squeaks and Wobble in 5 Minutes
“Why Does My Bed Frame Squeak When I Move?”
- Immediate fix: Locate the noise source. Disassemble the joint, rub candle wax on connecting surfaces, reassemble.
- Permanent solution: Add felt pads between wood-on-wood contact points (e.g., where slats meet rails).
“My Bed Wobbles on Hardwood Floors”
- Diagnose: Place a level across side rails front-to-back. If bubble isn’t centered:
- Legs are uneven: Adjust leveling feet (1/4 turn = 1/16″ height change)
- Floor is sloped: Slide furniture shims under the short leg until level
- Pro trick: Tape shims to legs with double-sided carpet tape—no slipping.
Wall Anchoring Your Headboard (Non-Negotiable for Safety)

Unanchored headboards cause 12,000+ injuries yearly. Follow this hospital-grade method:
- Find true studs: Use a stud finder that detects both wood and metal (for plaster walls)
- Mark 56″ height: Standard headboard bracket height (prevents tipping)
- Drill pilot holes: 1/8″ wider than lag bolt diameter
- Secure with 3″ bolts: Drive until washer bites into wood—never stop when resistance drops (indicates missed stud)
Warning: If you hit metal while drilling, stop immediately—it’s electrical wiring. Reposition 2″ left/right.
Maintenance Routine That Doubles Your Frame’s Lifespan
Most frames fail from ignored micro-movements. This quarterly ritual prevents disaster:
The 10-Minute Stability Check
– Step 1: Grab headboard and pull toward you (30 lbs force). Zero movement = good.
– Step 2: Tighten all bolts to 80% of original torque (over-tightening strips threads).
– Step 3: Inspect center legs for floor contact (reapply paraffin wax if squeaking).
Annual deep check: Remove mattress and look for hairline cracks where bolts enter wood. Sand smooth and apply wood hardener—if cracks exceed 1/8″, replace the part.
When to Call a Professional (Don’t Risk Injury)
Stop assembling if you encounter:
– Stripped bolt holes in wood (temporary fix: toothpicks + wood glue won’t hold long-term)
– Bent center beams (indicates weight overload—replace entire beam)
– Electrical issues in adjustable bases (exposed wires require certified repair)
– Guardrail gaps >3.5″ on bunk beds (immediate child entrapment hazard)
A professional installer ($75-$150) pays for itself when they spot critical flaws like undersized lag bolts in wall anchors—a $2 mistake that risks headboard collapse.
Your bed frame installation sets the foundation for 200,000+ hours of sleep. By following these precise steps—especially the torque sequence and 2.5-inch slat spacing—you transform a rickety structure into silent, rock-solid support. Remember: the difference between a good night’s sleep and a great one starts with bolts tightened in the right order. Tighten those center legs tonight, apply that paraffin wax, and wake up to a bed that doesn’t fight you. In just 90 minutes, you’ve built more than furniture—you’ve engineered the foundation for decades of rest. Now, go claim those restful nights you deserve.


