
That dated bed frame has been haunting your bedroom for months. You dread the thought of sanding – the dust clinging to every surface, the hours of tedious scraping, the inevitable splinters. What if you could transform it with fresh paint while skipping the sandpaper entirely? You absolutely can. This guide reveals exactly how to paint a bed frame without sanding using chemical prep and strategic product choices. Forget messy workshops and lung-clogging dust. We’ll show you how to achieve a smooth, durable finish on wood, metal, or laminate frames through meticulous cleaning, specialized primers, and precise application techniques. By the end, you’ll have a revitalized centerpiece that looks professionally done – no sanding required.
Deep Cleaning: Your First Step to Skip Sanding
Paint fails on dirty surfaces, not because of texture but because of invisible barriers. Grease from hands, furniture polish buildup, and airborne dust create a slick layer that repels paint. Your critical first move is a military-grade clean. Mix trisodium phosphate (TSP) with warm water according to package instructions and scrub every surface with a stiff-bristle brush. Pay special attention to corners where grime accumulates and rails you grip nightly. Rinse thoroughly with clean water – residue attracts dust. For stubborn waxy buildup, follow with a 50/50 vinegar-water solution to neutralize residues. Never skip drying time; moisture traps contaminants under paint. Let the frame air-dry 24 hours in a dust-free space. This chemical cleanse replaces sanding by exposing the true substrate for adhesion.
Why Deglossers Beat Sandpaper for Bed Frames
Liquid deglossers (or “liquid sandpaper”) chemically etch glossy finishes without abrasion. Apply with a lint-free cloth using firm circular motions – you’ll see the surface turn cloudy as it breaks down varnish. Work in small sections, following product dwell times (usually 5-15 minutes). Wipe clean with a fresh cloth before it dries. This step is non-negotiable for varnished or polyurethane-coated frames. Unlike sanding, deglossers won’t damage intricate carvings or leave uneven patches. Test on a hidden spot first; some lacquered finishes react unpredictably. Always wear gloves and work in ventilated areas – these solvents are potent.
Why High-Adhesion Primer Beats Sanding for Bed Frames
Standard primers fail on slick surfaces. For how to paint a bed frame without sanding, you need molecular bonding. High-adhesion primers contain polymers that grip sealed wood, laminate, and metal like industrial glue. Shellac-based options like BIN block tannin bleed-through from dark woods when painting light colors. For metal frames, rust-inhibiting primers prevent corrosion under new paint. Apply these with a synthetic brush – natural bristles react poorly with shellac. Thin coats prevent drips in vertical slats and spindles. Most require only one coat if applied properly. Watch for “grabbing” – the primer should feel slightly tacky as it dries, proving it’s bonding to the deglossed surface.
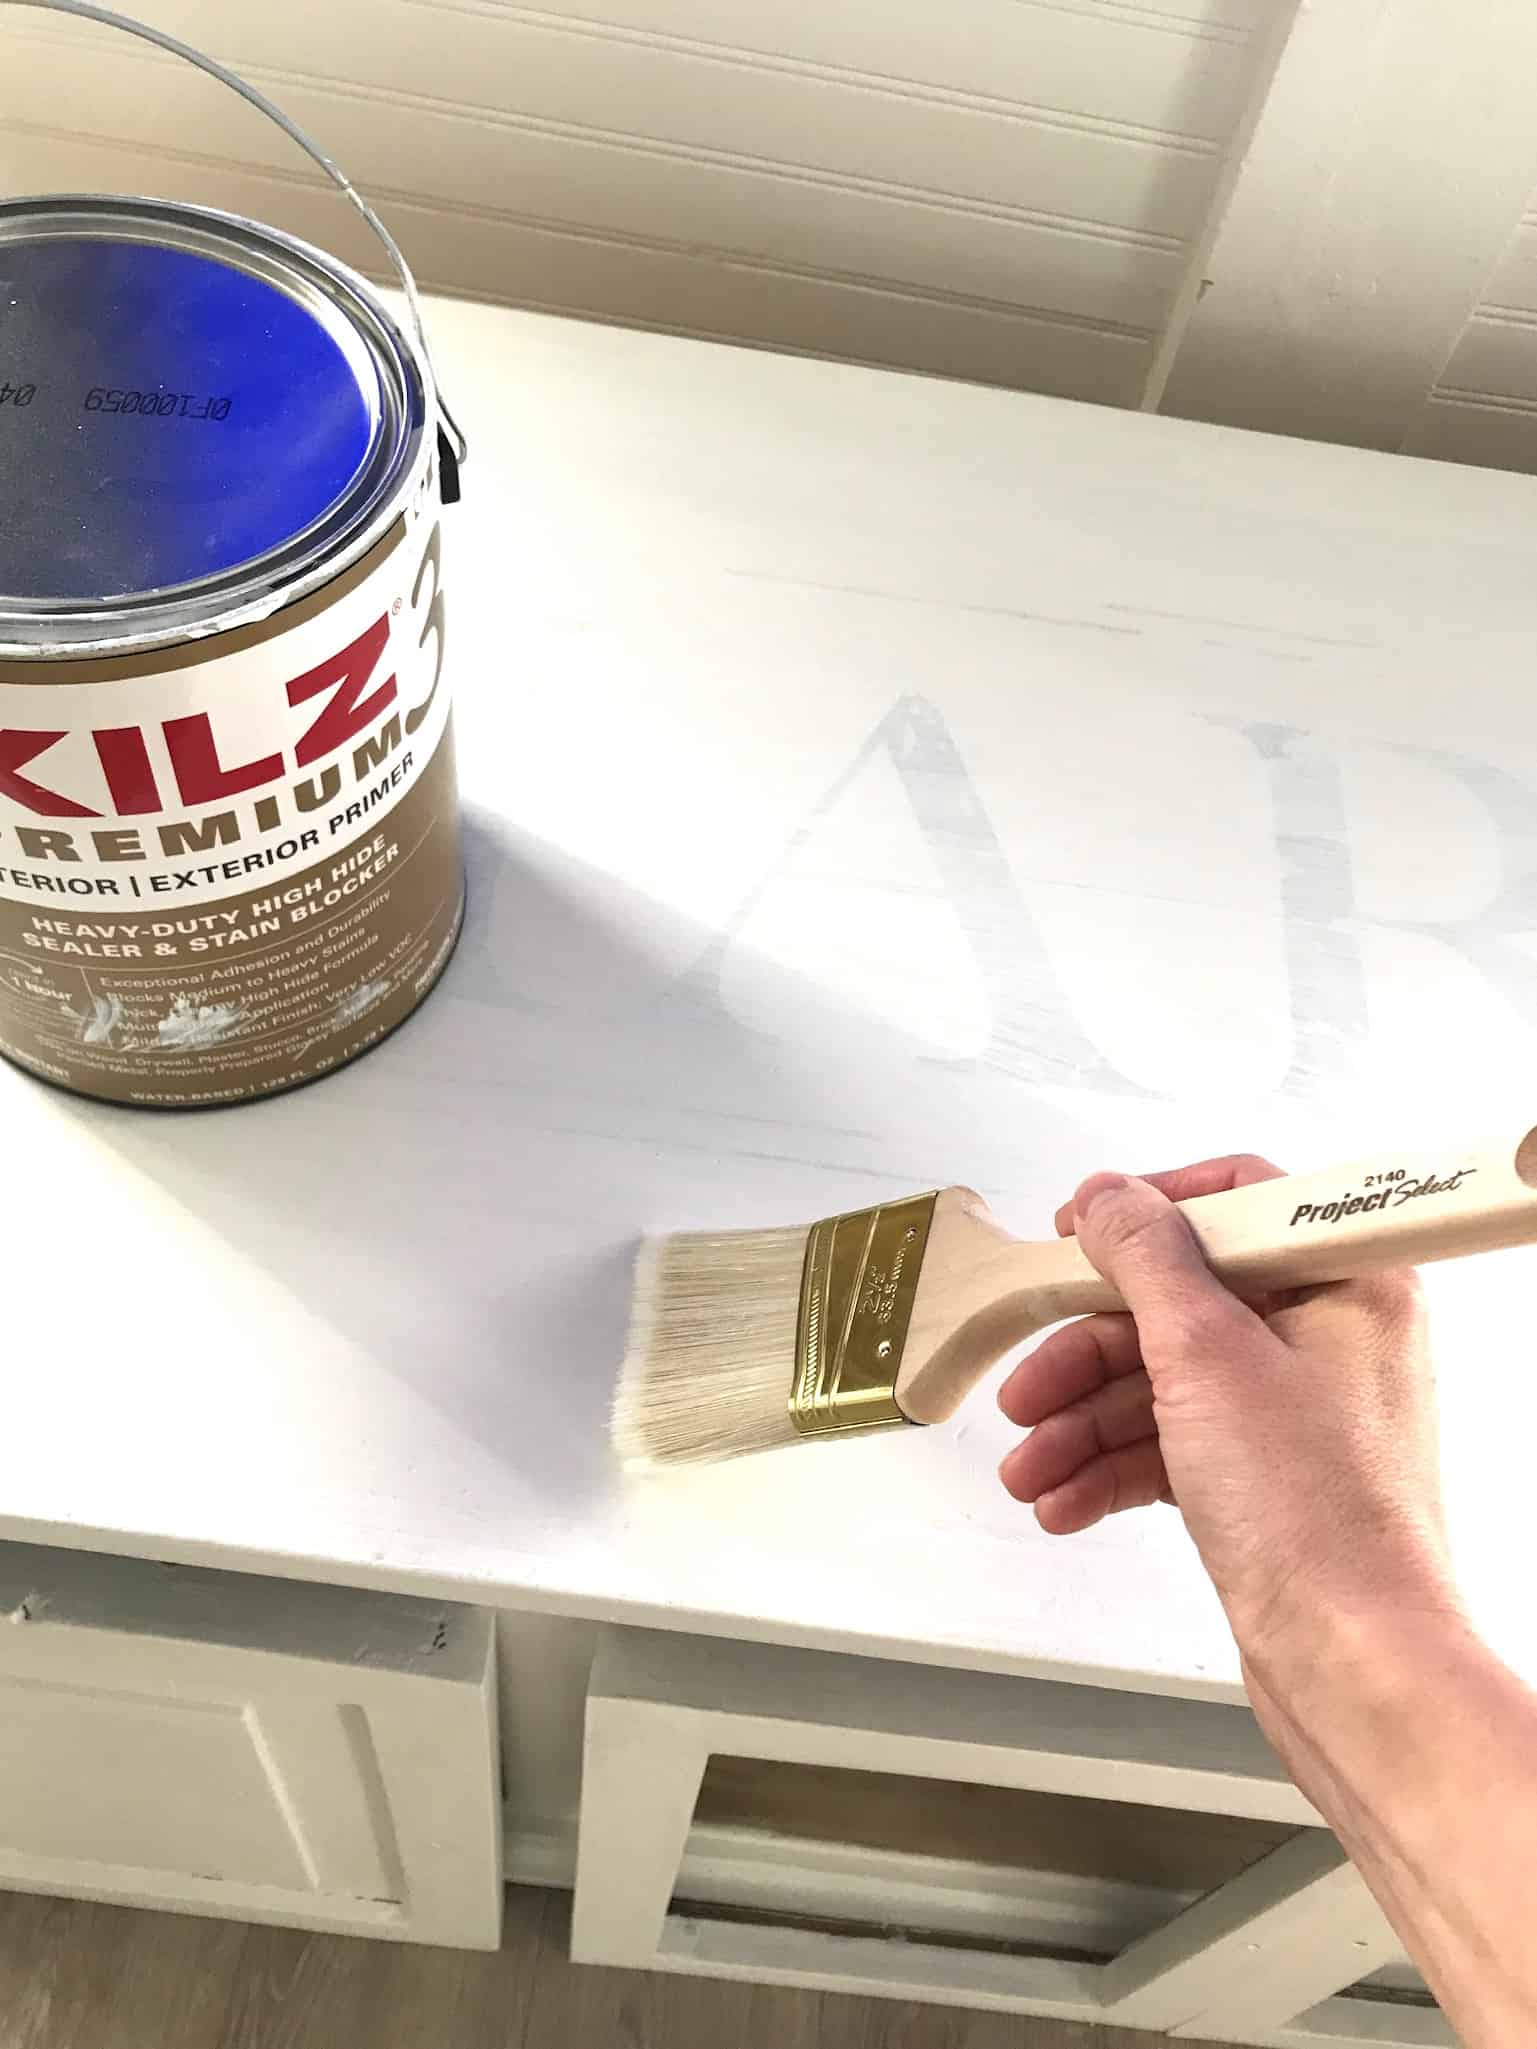
Primer Application Secrets for Flawless Coverage
Pour primer into a disposable container to avoid contaminating the can. Use a 2-inch angled brush for edges and a mini foam roller for flat panels. Work top-to-bottom to catch drips. For intricate headboards, wrap a microfiber cloth around a sponge for precision. Never overload your tool; excess primer pools in joints and creates bumps. Maintain a wet edge by blending into recently painted sections. In dry climates, mist your brush lightly with water to slow drying. Allow 2-4 hours between coats – rushing causes peeling. The cured primer should feel uniformly smooth, not sticky. If you see shiny patches, reapply to those spots only.
Step-by-Step: Painting Your Bed Frame in 5 No-Sand Stages
Disassembly is your secret weapon. Remove slats, casters, and hardware before starting. This exposes joints and prevents paint bridging between moving parts. Keep screws organized in labeled bags. Lay components on drop cloths in a well-ventilated area – garages work if humidity stays below 70%.
Stage 1: The Critical Deglossing Pass
Apply liquid deglosser to one section (e.g., headboard). Wait exactly as directed – under-dwell won’t etch, over-dwell can damage wood. Wipe with clean cloths using straight strokes (not circles) to avoid streaks. Repeat until cloth comes away clean.
Stage 2: Primer Precision Application
Use a high-adhesion primer within 24 hours of deglossing. For metal frames, choose rust-inhibiting formulas. Apply in the direction of wood grain or metal seams. Let dry 4 hours minimum.
Stage 3: Thin Paint Coats for Professional Results
Choose chalk paint for maximum grab on slick surfaces, or acrylic enamel for wipeable durability. Pour paint through a mesh strainer to remove lumps. Apply first coat thinly – thick paint sags on vertical surfaces. Keep a damp cloth nearby to wipe drips immediately.
Stage 4: The Mandatory Topcoat Seal
After 48 hours of paint curing, apply water-based polycrylic. Oil-based polyurethane yellows over time; polycrylic stays crystal clear. Use a foam brush to avoid stippling. Two coats are essential for bed frames – they endure constant friction from sheets and bodies. Lightly sand between coats with 400-grit sanding sponge to knock off nibs.
Stage 5: Strategic Reassembly
Reattach hardware only after full 7-day cure. Place felt pads under feet to prevent floor scratches. Wait 14 days before heavy use to ensure maximum hardness.
Top 3 Paint Types That Stick Without Sanding

Not all paints bond to deglossed surfaces equally. Your choices:
- Chalk Paint: Requires zero sanding and minimal priming. Its matte finish hides minor imperfections but demands wax or polycrylic topcoating. Ideal for vintage wood frames.
- Acrylic Enamel: Self-leveling and durable. Withstands daily bumps on metal frames. Dries to a smooth satin sheen in 2 hours. Avoid cheap versions – they yellow on dark woods.
- Furniture Spray Paint: Contains built-in primer for glossy surfaces. Perfect for intricate metal frames. Hold 10 inches away and use sweeping motions to prevent runs.
Why Spray Paint Beats Brushes for Complex Frames
HVLP sprayers deposit microscopic droplets that adhere evenly to curves and carvings. But prep is crucial: Mask off threads on bolts with tape to avoid seized hardware. For DIYers, aerosol spray paints like Rust-Oleum Universal work well. Shake vigorously for 2 minutes, test on cardboard first, and apply 3 light coats instead of one heavy coat. Work in 70°F temperatures – cold causes orange peel texture.
Fixing Peeling and Bubbling Without Starting Over
Peeling usually means inadequate cleaning, not poor sanding. Scrape loose paint with a plastic putty knife (metal scratches). Clean the spot with TSP, re-apply deglosser, and spot-prime. For bubbles caused by trapped moisture, sand only the blistered area with 320-grit sponge, wipe clean, and re-prime. Never paint over compromised sections – it spreads. If entire sections fail, strip with CitriStrip gel instead of sanding. Apply gel thickly, wait 30 minutes, then scrape with a nylon brush.
Metal and Laminate Bed Frames: Special Prep Techniques

Metal frames need rust prevention. Clean with vinegar-water solution first to neutralize oxidation. Use a wire brush only on rust spots – never sand the entire frame. Apply metal-specific bonding primer within 1 hour of cleaning to prevent flash rust. For laminate (common in modern frames), skip deglosser – it can melt the surface. Instead, clean with TSP, then use a high-adhesion primer like Zinsser Bulls Eye 1-2-3. Laminate requires two primer coats; its smoothness demands extra grip.
Seasonal Painting Tips: Temperature and Humidity Guide
Paint fails when conditions are wrong. Ideal range is 60-85°F with 40-70% humidity. Below 50°F, paint won’t cure properly; above 90°F, it dries too fast causing brush marks. High humidity makes primer milky and extends dry times. Monitor with a $5 hygrometer. In winter, run a space heater 6 feet from the frame. In summer, paint early morning when humidity drops. Never paint during rain – moisture gets trapped. Allow 48 hours of stable conditions before reassembly.
Maintaining Your Painted Bed Frame for Years
Your finish lasts longest with smart care. Dust weekly with microfiber cloths – never feather dusters that scratch. For scuffs, rub gently with a dab of olive oil on cotton swab. Deep clean with mild soap (Dawn dish soap diluted 1:10 with water) only when necessary. Avoid all-purpose cleaners; their ammonia dulls finishes. Touch up chips immediately with matching paint to prevent moisture seepage. Rotate mattress position quarterly to distribute wear evenly. With proper topcoating, expect 5+ years of beauty without repainting.
Final Note: Skipping sanding isn’t cutting corners – it’s working smarter. By prioritizing chemical prep over abrasion, you protect delicate frame details while achieving industrial-strength adhesion. The secret lies in the sequence: degloss → prime → paint → seal. Stick to this formula, and your bed frame won’t just look renewed – it’ll stay flawless through years of restless nights and morning stretches. Now that you know how to paint a bed frame without sanding, that tired heirloom or thrift store find can finally match your dream bedroom. Grab your deglosser and reclaim your space tonight.


