
Ever tried moving or storing your bed only to discover you don’t know how to properly close the frame? You’re not alone. Each year, thousands of homeowners damage their bed frames during relocation attempts because they skip proper disassembly. Knowing how to close a bed frame correctly saves time, prevents costly damage, and ensures your furniture survives the move intact. Whether you’re rearranging your bedroom, preparing for a move, or simply storing your bed temporarily, this guide provides the specific techniques needed for every common bed frame type. You’ll learn exactly which fasteners to target, how to protect delicate finishes, and the professional organizer’s trick for keeping all hardware together—making reassembly surprisingly simple.
Essential Safety Steps Before Closing Your Bed Frame
Before touching any hardware, protect yourself and your furniture with these critical preparations. Bed frames can weigh 50-150 pounds depending on material and size, making proper safety precautions non-negotiable. Clear a 6-foot perimeter around your bed to prevent tripping over disassembled parts or dropped tools. This workspace requirement is especially crucial when learning how to close a bed frame for the first time.
Remove All Bedding and Support Layers Completely
Start by stripping the mattress, pillows, and all linens. Then carefully lift and set aside your mattress foundation or box spring. Many people skip this step when attempting how to close a bed frame, only to find their view obstructed when trying to access critical hardware underneath. For memory foam or heavy latex mattresses, enlist a helper—these can weigh up to 150 pounds and cause injury if mishandled during the bed frame closing process.
Gather Your Specific Bed Frame Disassembly Toolkit
Most bed frame disassembly requires just four essential tools, but having the wrong size can strip critical fasteners. For modern metal frames, you’ll need a 3/8-inch and 5/16-inch socket set plus a rubber mallet. Traditional wooden frames typically require 7/16-inch and 1/2-inch wrenches. Always include a magnetic parts tray—those tiny cam lock pins disappear instantly on carpet. Keep safety glasses nearby too; years of accumulated dust often dislodges when separating frame sections during the closing process.
Disassembling Modern Metal Bed Frames Without Damage
Metal bed frames dominate today’s market for good reason—they’re durable, affordable, and designed for straightforward disassembly when you know how to close a bed frame properly. The secret lies in identifying the specific fastener system your frame uses before applying any force. Most modern frames employ one of three connection types, each requiring a slightly different closing technique.
Identifying Your Metal Frame’s Fastener System
Look closely at where side rails meet the headboard—this junction holds the key to efficient disassembly. Cam lock systems feature small plastic housings with a visible metal pin that rotates 90 degrees. Bolt-and-nut assemblies show exposed hex heads requiring socket tools. Hidden bolt systems have small access holes in the frame where Allen wrenches engage internal fasteners. Misidentifying these can lead to stripped hardware when attempting how to close a bed frame, so examine carefully before proceeding.
Proper Cam Lock Release Technique for Platform Beds
If your frame uses cam locks (common in IKEA and similar platform beds), insert a 3/32-inch Allen key into the small access hole. Rotate the key 90 degrees clockwise until the internal cam disengages—you’ll feel the resistance release. Never force it beyond this point, as over-rotation damages the cam mechanism. For stubborn locks, tap the side rail gently with a rubber mallet while rotating the key. This technique prevents the “stuck cam lock” frustration that derails many DIY bed frame closing attempts.
Handling Traditional Wooden Bed Frames During Disassembly
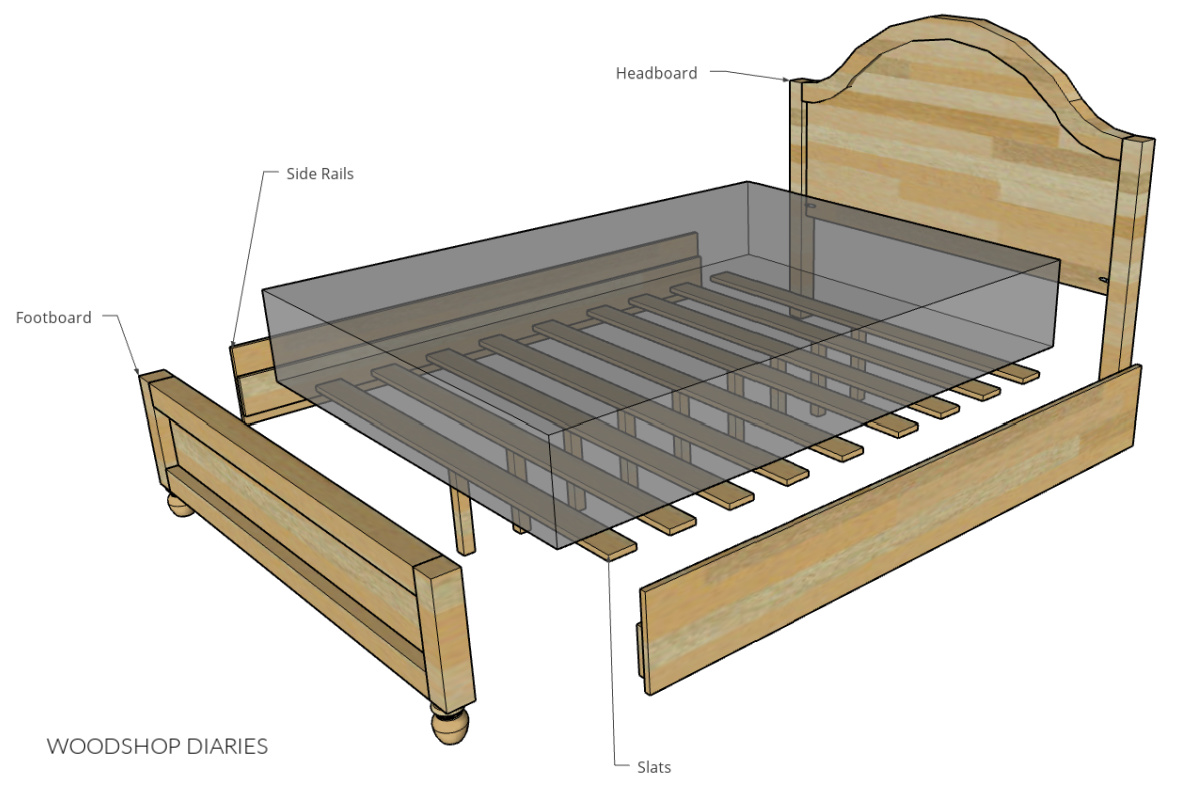
Wooden bed frames require different handling than metal versions due to their weight distribution and connection methods. The classic four-poster or sleigh bed uses substantial hardware that can seize over time, making proper technique essential when you need to close a bed frame without damaging the wood.
Removing Large Hex Bolts Without Stripping Threads
Wooden frames typically secure side rails with 5/8-inch or 3/4-inch hex bolts running vertically through the frame posts. Spray penetrating oil on visible threads first if the bed hasn’t been moved in years. Use a six-point socket (not a wrench) for maximum grip, and apply steady pressure while turning counterclockwise. If bolts resist, have a helper stabilize the headboard while you work—sudden release can cause heavy wooden sections to fall unexpectedly during the bed frame closing process.
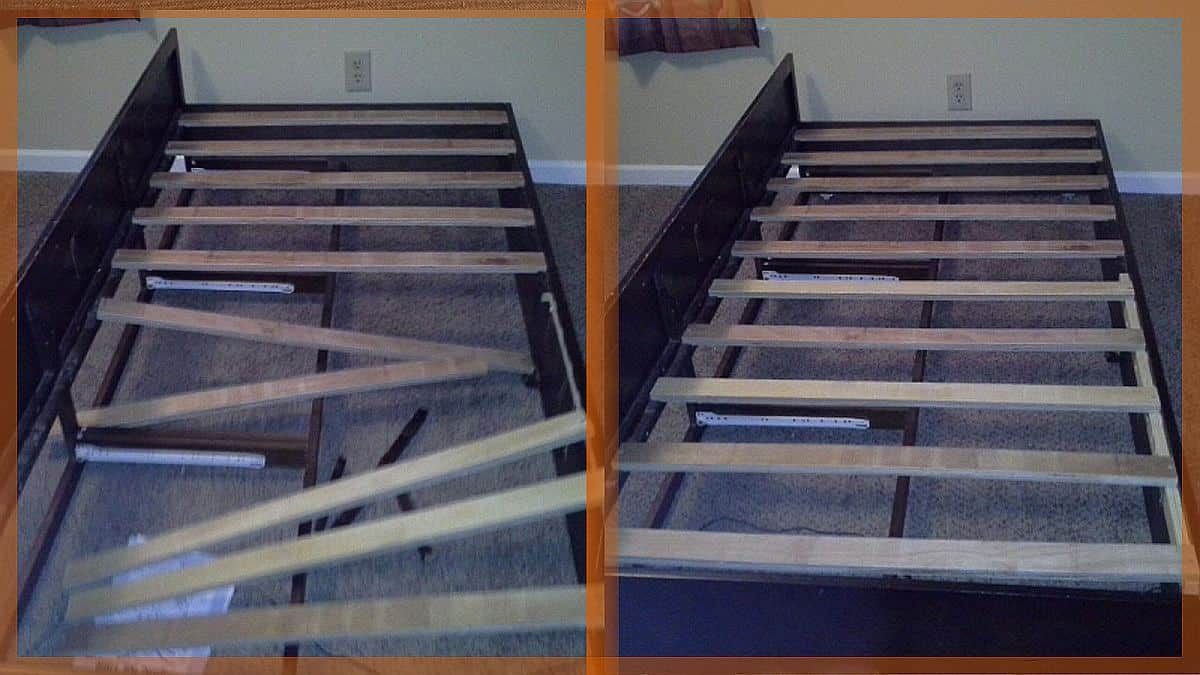
Detaching Wooden Slats and Center Supports Safely
Unlike metal frames, wooden bed frames almost always incorporate wooden slats that require careful removal. Start from one end and lift each slat slightly to disengage it from the frame’s lip or peg system. For center support legs, locate the mounting brackets underneath—these often use large carriage bolts that require two people to manage during disassembly. Never pull slats sideways; this common mistake when learning how to close a bed frame can crack the wooden slats or damage the frame’s support channels.
Organizing Hardware for Stress-Free Bed Frame Reassembly
This step makes the difference between a 20-minute reassembly and an hour of frustrated searching for missing parts. Professional movers use a system that takes just five extra minutes but saves enormous headaches later—exactly what you need after completing how to close a bed frame.
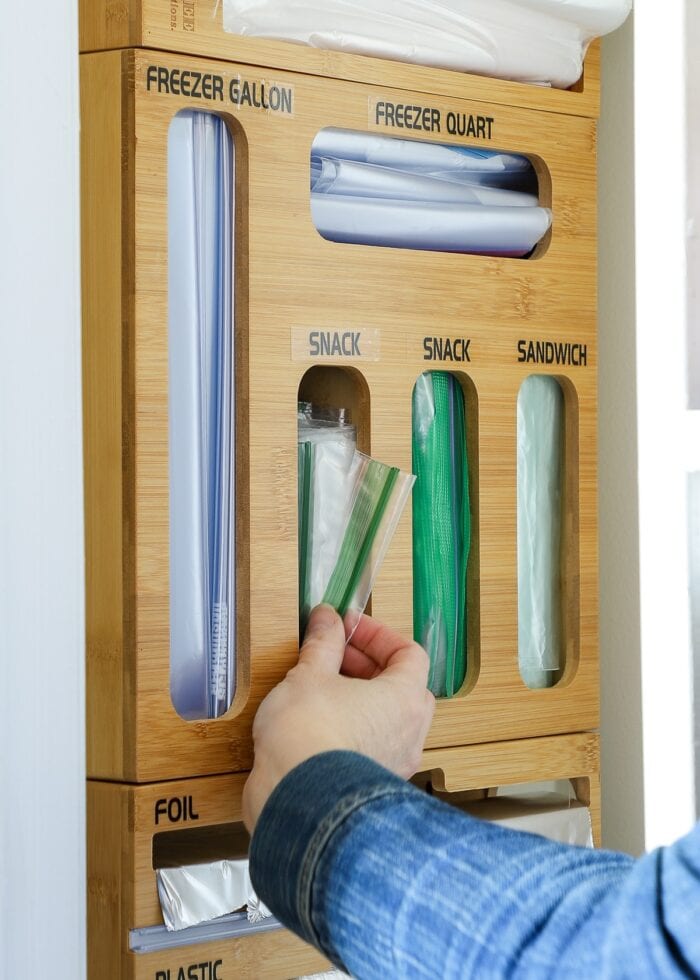
The Ziplock Bag Labeling System That Works
Place all hardware from each connection point in separate quart-sized ziplock bags. Label each with painter’s tape: “Headboard Left Connection,” “Center Support Left,” etc. For cam lock systems, include both the plastic housing and metal pin in the same bag—they’re useless separated. Tape bags securely to the corresponding frame section with the sticky side out, making reassembly as simple as matching bag locations. This method prevents the #1 problem people face when they don’t know how to close a bed frame properly: mixed-up or lost hardware.
Common Bed Frame Closing Mistakes That Cause Permanent Damage
Even experienced movers make these critical errors when attempting how to close a bed frame. Avoid these pitfalls to prevent costly repairs or replacement.
Forcing Stuck Connections Instead of Diagnosing the Problem
When a joint resists separation, 9 times out of 10 there’s another hidden fastener still engaged. Rushing the bed frame closing process by prying or hammering often cracks wooden posts or bends metal rails beyond repair. Instead, systematically check all four corners—many frames have secondary locking mechanisms you might have missed. Run your fingers along all visible edges to feel for additional access holes or fasteners before applying force.
Laying Bare Frame Parts Directly on Hard Surfaces
The moment you complete how to close a bed frame, the temptation is to set pieces down immediately. Never place wooden or metal frame sections directly on concrete, tile, or hardwood floors. The weight concentration at contact points creates permanent dents in wood and scratches metal finishes. Always use moving blankets, cardboard, or even old bed sheets underneath disassembled parts. For metal frames, this prevents rust transfer from concrete floors that ruins the powder coating.
Expert Tips for Transporting Disassembled Bed Frames
How you secure your disassembled frame determines whether it arrives ready for reassembly or needs repair. These professional techniques protect your investment during transit.
Creating a Compact Bundle for Moving Trucks
Lay the headboard flat, then stack side rails on top, followed by the footboard. Use moving straps (not rope) to secure the bundle, applying even pressure across all pieces. Insert cardboard between wood surfaces to prevent finish damage during transport. For metal frames, wrap all sharp edges with bubble wrap—those exposed tube ends can puncture other belongings in your moving truck. This bundling method, perfected by professional movers, ensures your successful how to close a bed frame effort isn’t undone by poor transportation.
Final Checks Before Storing or Moving Your Closed Bed Frame
Complete these verification steps before considering your bed frame properly closed. Skipping them leads to frustrating discoveries mid-move or during reassembly.
The Three-Point Hardware Verification System
- Visually confirm all labeled hardware bags are attached to their corresponding frame sections
- Physically shake each frame component to ensure no loose parts remain inside hollow rails
- Count slats against your initial inventory—wooden slats frequently get overlooked during the bed frame closing process
This verification prevents the nightmare scenario of arriving at your destination only to realize you’re missing critical hardware. Properly executed how to close a bed frame procedures always include this final quality check.
Knowing how to close a bed frame properly transforms what many consider a chore into a straightforward 20-30 minute process. The key is identifying your specific frame type first, then applying the exact disassembly technique designed for that construction. Remember to always remove all bedding first, use the correct tools for your fastener system, and implement the ziplock bag labeling method for hardware organization. When moving day arrives, your disassembled frame will stay protected with proper bundling and edge protection. Most importantly, never force connections—take time to identify all fasteners before applying pressure. By following these precise steps for how to close a bed frame, you’ll save hours during reassembly and extend your furniture’s lifespan through careful handling. Keep this guide handy for your next move, and you’ll wonder why you ever struggled with bed frame disassembly before.


