
Your senior Labrador struggles to rise from the floor each morning. Your energetic German Shepherd kicks bedding off a standard bed during nightly zoomies. An elevated dog bed solves both problems—but store-bought versions cost $150+ and rarely match your home’s style. Learning how to make a dog bed frame yourself creates a custom, durable solution that boosts your dog’s comfort while complementing your decor. This guide reveals exactly how to build a rock-solid elevated platform that supports up to 100 pounds of wriggling, tail-wagging weight. You’ll discover why slatted ventilation prevents moisture buildup, how to calculate the perfect height for arthritic joints, and which non-toxic finishes withstand chew tests. Skip the flimsy pet store models and craft a heirloom-quality bed that lasts years.
Calculate Exact Dimensions for Your Dog’s Size
Getting measurements wrong guarantees instability or discomfort. Your frame’s interior must match your mattress dimensions precisely—no guessing. A mismatched frame causes bedding to shift or creates dangerous gaps where paws could slip.
Determine the Ideal Platform Size and Height
Measure your dog’s current mattress length and width. The frame’s interior dimensions should equal these measurements exactly so the cushion sits flush inside. For large breeds like Golden Retrievers, a 40″ x 30″ platform works universally. Crucially, calculate height based on your dog’s shoulder height: multiply by 0.25–0.33. An 18-inch-tall dog needs a 4.5–6 inch bed height—low enough for easy access but high enough to reduce joint strain. Senior dogs require the lower end of this range; active breeds tolerate taller frames up to 16 inches.
Select Lumber Dimensions for Maximum Stability
Use 2×4 pine for the main frame—its thickness prevents warping under weight. For legs, 4×4 posts provide critical load-bearing capacity; avoid thinner lumber that cracks under dynamic forces like jumping. Platform slats need 1×3 or 1×2 boards spaced ½–¾ inch apart for airflow. This gap size stops paws from slipping through while allowing hair and debris to fall through for easy cleaning. Never use solid plywood—it traps moisture against the mattress, causing mold.
Gather Pet-Safe Materials Before Cutting Wood
Rushing this step risks chemical exposure or structural failure. Pet-safe materials aren’t optional—dogs lick and chew surfaces constantly. Using standard finishes or untreated wood invites health hazards.
Choose Non-Toxic Wood and Hardware
Pine offers affordability and ease of cutting for beginners, but seal it thoroughly to prevent splinters. For heirloom durability, select oak or maple—hardwoods resist scratches from claws. All screws must be #8 or larger, 2.5–3 inches long, with washers to distribute pressure. Countersink every screw head flush with the wood surface; protruding hardware can scratch your dog’s belly during movement. Never use staples or nails—they loosen over time as the dog shifts position.
Essential Tools for a Wobble-Free Frame
You need only five tools:
– Miter saw (for precise 90° corner cuts)
– Drill/driver with #2 Phillips bit
– Two 24″ bar clamps (to hold joints square during assembly)
– Orbital sander (80–220 grit paper)
– Tape measure and carpenter’s square
Skip complex joinery—basic butt joints reinforced with wood glue and screws create sufficient rigidity. Pocket holes add strength but aren’t essential. Always clamp pieces while drilling pilot holes; unsecured wood shifts under pressure, causing misaligned joints that wobble.
Assemble the Frame Using Load-Bearing Techniques
This is where most DIYers fail—attaching legs incorrectly causes dangerous tipping. Standard table hardware kits collapse under a 60+ pound dog’s weight. You need industrial-grade stability.
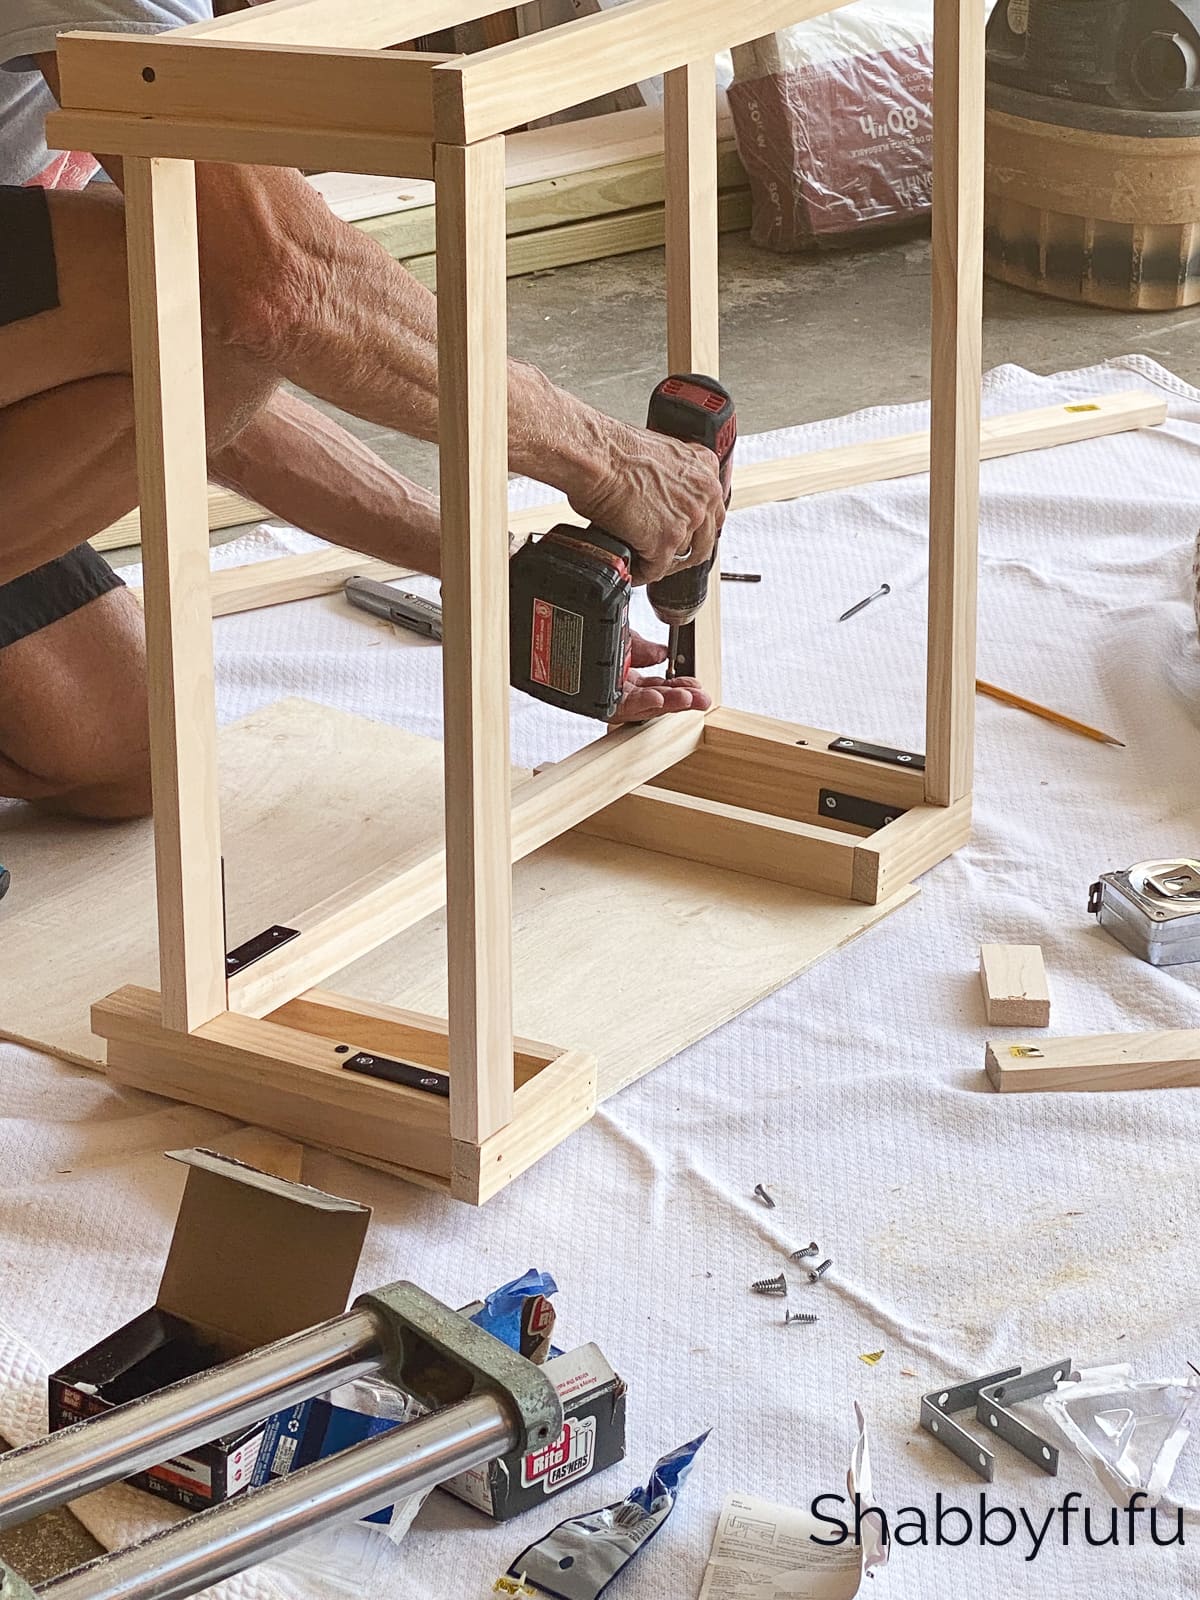
Construct the Base Frame with Reinforced Corners
Cut four frame pieces: two lengths matching your mattress length, two widths matching the mattress width minus 3 inches (to account for 2×4 thickness). Dry-fit the rectangle, then apply wood glue to all mating surfaces. Clamp tightly and drill ⅛-inch pilot holes through frame sides into end pieces. Drive two 2.5″ screws per corner, countersunk ¼ inch deep. Check for squareness by measuring diagonally corner-to-corner—both measurements must match within ⅛ inch.
Secure Legs with Through-Bolt Reinforcement
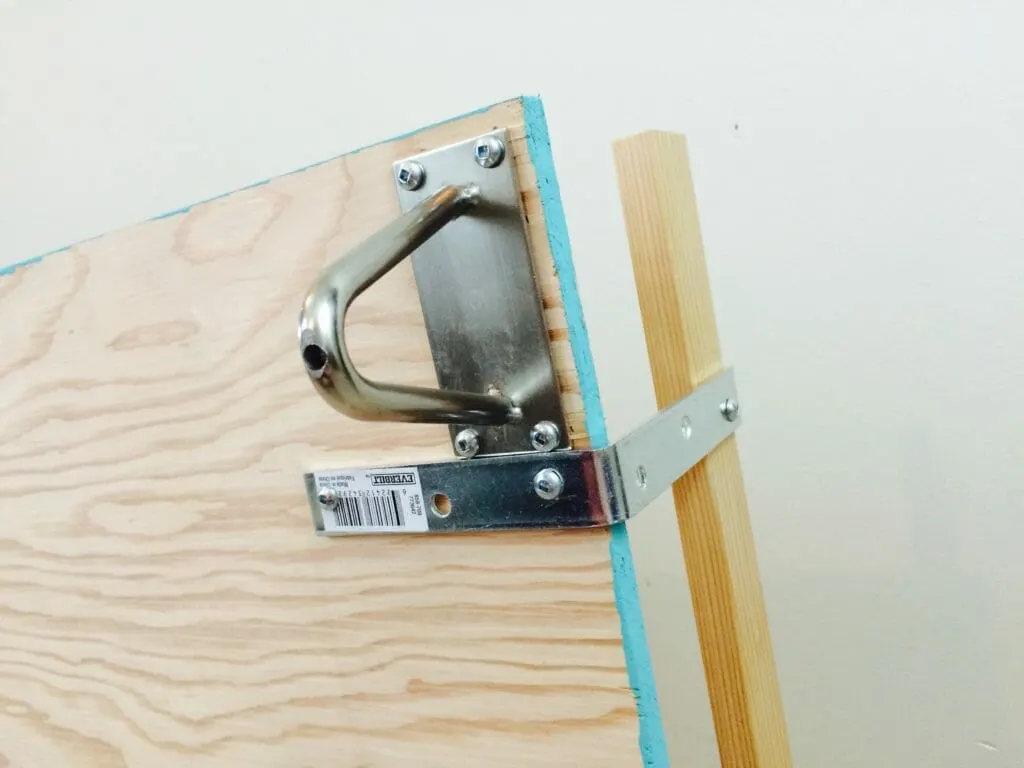
Cut four 4×4 legs to your calculated height. Position one leg flush inside each frame corner. Drill a ⅜-inch hole straight down through the frame’s top edge into the leg’s center. Insert a 3″ lag bolt with washer through this hole—this anchors the leg vertically better than side screws. Add diagonal corner braces: cut 6×6-inch plywood triangles, glue to leg/frame joints, and screw through both surfaces. This prevents lateral sway when your dog spins before lying down.
Apply Safety-First Finishing Techniques
Skipping proper finishing invites splinters and chemical exposure. Dogs lie directly on this surface for hours—you can’t compromise here.
Sand Strategically to Eliminate Hazards
Start with 80-grit paper on an orbital sander to remove saw marks, focusing on edges where paws contact wood. Progress to 120-grit, then 220-grit for a glass-smooth feel. Pay special attention to leg bottoms—rough spots scratch floors and cause sliding. Wipe all dust with a tack cloth; residual particles create bumps under your finish that trap moisture. Never skip sanding between coats—this ensures adhesion for long-term chip resistance.
Select and Apply Vet-Approved Finishes
Water-based polyurethane is the top choice: hard-drying, scratch-resistant, and non-toxic after 72-hour cure. Apply three thin coats with a foam brush, sanding lightly with 220-grit between coats. For chew-prone dogs, use food-grade mineral oil—reapply monthly but poses zero toxicity risk. Avoid ALL oil-based finishes; their fumes linger for weeks and cause respiratory irritation. Test your finish by sitting on the bed for 10 minutes—if you smell odors, your dog will too.
Customize for Your Dog’s Specific Needs

Generic beds ignore breed-specific requirements. A Dachshund needs lower height than a Great Dane; anxious dogs crave enclosed spaces. Tailor these pro modifications.
Integrate Stability and Comfort Upgrades
Add a 1×2 lip around the frame’s interior top edge to prevent mattress shifting during sleep. For arthritic dogs, attach rubber paw pads to leg bottoms—this cushions joints during entry/exit. If your dog chews, round all sharp corners with a router (¼-inch radius) before finishing. For multi-dog households, build dual-tier frames: lower platform at 6 inches for seniors, upper at 12 inches for active dogs.
Prevent Common Build Mistakes
Never skip diagonal braces—they’re the difference between a bed that wobbles and one that withstands a 90-pound dog jumping down. Always pre-drill leg holes; pine splits easily without pilot holes, creating weak points. If using pine, apply wood conditioner before staining to avoid blotchiness. Finally, test stability by standing on the platform—any flex means add cross-braces between legs immediately.
Maintain Your Bed for Long-Term Safety
Neglecting maintenance turns a safe bed into a hazard. Loose screws create pinch points; worn finishes expose splinters. A 5-minute monthly check prevents emergencies.
Conduct Critical Monthly Inspections
Tighten all screws and bolts—dogs’ movement gradually loosens hardware. Check leg corners for stress cracks, especially in pine frames. Vacuum hair and debris from slat gaps weekly to prevent odor buildup. If you spot chew marks, sand the area smooth and reapply finish immediately; exposed wood invites further chewing. Replace mineral oil finishes every 30 days to maintain protection.
Address Wear Before It Becomes Dangerous
When polyurethane starts flaking, lightly sand the affected area and apply one new coat—don’t wait for bare wood exposure. If legs develop wobble, add L-brackets inside corners. For persistent sliding, attach non-slip felt pads to leg bottoms; they protect floors while anchoring the bed. At the first sign of structural flexing, install a center support beam running front-to-back under the platform.
Building how to make a dog bed frame isn’t just DIY—it’s an investment in your dog’s health. That wobble-free platform reduces joint stress for senior dogs, while breathable slats prevent overheating in thick-coated breeds. Your custom creation outlasts flimsy store models because you controlled every detail: the reinforced leg joints, the pet-safe finish, the height calibrated to your dog’s shoulder. Now, watch your pup claim their new throne—the satisfied sigh as they sink into a bed built just for them is worth every sawdust-covered moment. Start measuring tonight; tomorrow, you’ll both sleep easier.


