
Your brand-new wood bed frame looks too perfect—too sterile. That crisp, factory-finish surface lacks the soulful character of a piece that’s weathered decades in a farmhouse or cottage. But you don’t need to wait 50 years for that coveted rustic charm. How to distress wood bed frame techniques let you create instant history through strategic wear and tear. This transformation turns mass-produced furniture into a conversation-starting heirloom with visible texture, layered finishes, and authentic-looking age marks. Forget cookie-cutter decor; within a weekend, you’ll master methods to mimic generations of gentle use, from subtle paint chipping to deeply worn wood grain. We’ll cover exactly where to strike, sand, and stain your bed frame for results that look naturally aged—not artificially damaged.
Distressing wood bed frames isn’t about random destruction; it’s controlled storytelling through craftsmanship. Every dent, scratch, and paint chip should hint at imagined decades of use: a child’s hand gripping the post, a door knob bumping the corner, or sunlight fading the top rail. The magic happens in layering techniques—combining physical distressing with paint chemistry and strategic aging—to build depth that flat finishes can’t replicate. Whether you’re working with pine, oak, or reclaimed lumber, these methods adapt to your bed frame’s structure. Most importantly, you’ll avoid the “craft project” look that plagues DIY distressing. By the end of this guide, you’ll know exactly how to target high-wear zones like headboard corners, footboard edges, and rail joints where real aging occurs.
Critical Safety Steps Before Distressing Your Wood Bed Frame
Skipping prep turns a fun project into a hazardous mess. Before touching your bed frame with any tool, create a workspace that protects both you and your furniture. Move the bed frame to a well-ventilated garage or outdoor area—never work indoors with chemical finishes. Lay heavy-duty plastic sheeting under the entire piece, extending 3 feet beyond its edges to catch flying debris. Your non-negotiable safety gear must include:
- ANSI-approved safety goggles (not sunglasses) to shield eyes from wood chips during hammering or sanding
- N95 respirator mask (minimum) when sanding or applying stains to prevent inhaling fine particulates
- Rip-resistant work gloves with grip palms to protect hands from splinters and tool slippage
Now inspect your bed frame’s structural integrity. Tighten all bolts and joints—distressing weak spots could cause collapse. Remove hardware like drawer pulls or decorative finials. Clean every surface with a tack cloth to eliminate dust that would ruin paint adhesion. For previously finished frames, use 220-grit sandpaper to “deglaze” glossy areas; this isn’t full sanding, just scuffing to create a “tooth” for new finishes to grip. Test your sanding pressure on a hidden spot—too hard creates visible scratches that compromise the aged effect.
5 Professional Wood Distressing Techniques for Bed Frames
Create Realistic Wear Marks with Chains and Hammers
Forget random dents—authentic aging concentrates wear where hands naturally contact surfaces. Hold a metal chain (like a bike chain) 6 inches above your bed frame’s headboard corners and footboard edges. Drop it repeatedly while shifting angles to mimic decades of grasping hands. For deeper character, wrap nails or screws in cloth to create a “nail bag,” then gently strike bed rail joints and post bases. Pro tip: Focus 70% of impact on the top third of vertical surfaces—this mirrors real-life wear patterns where hands rest while sitting or standing. Never use excessive force; subtle dings build credibility. After striking, run your palm over the surface—you should feel texture but not deep gouges that catch fabric.
Achieve Authentic Chippy Paint in 3 Layers
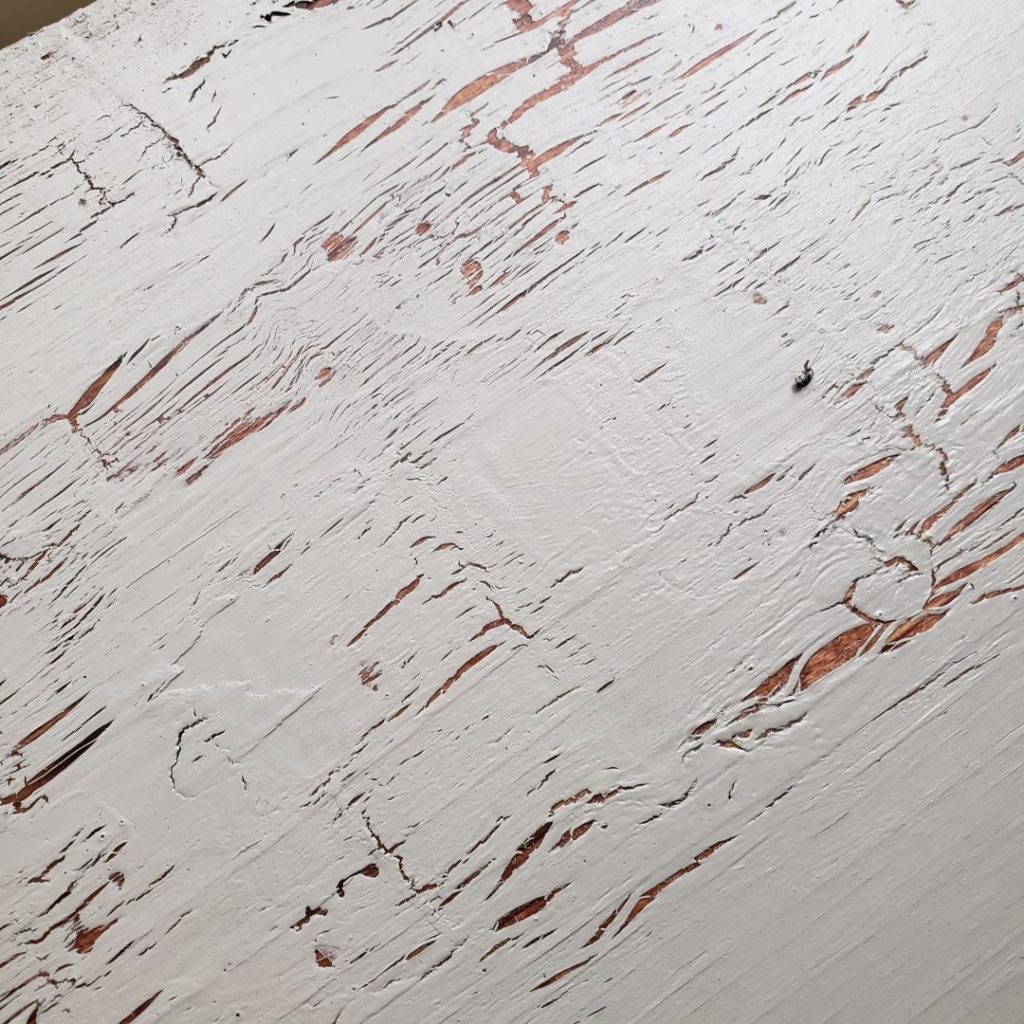
The most convincing distressed finishes reveal multiple paint eras beneath the surface. Start by applying a burnt umber or navy base coat to your entire bed frame with a foam brush. Let dry 24 hours. Next, brush on crackle medium only along edges where paint would naturally wear thin—top rails, corner posts, and drawer fronts. While still tacky, apply a creamy white top coat. As it dries (usually 15-30 minutes), hairline cracks will form. Now the magic: lightly sand just the cracked areas with 150-grit paper. The white paint flakes away, exposing the base color in organic, uneven patches. For richer history, add a third layer: after the crackle step, dab a moss green paint sparingly before the final white coat. Sand selectively to reveal all three eras.
Age Wood Naturally with Stain and Wax Secrets

Skip paint entirely for a timeworn wood look that highlights grain. Apply dark walnut gel stain with a lint-free rag, working with the grain. Immediately wipe 90% off, leaving residue only in dents and grain troughs. Let dry 12 hours. Now apply clear furniture wax liberally over the entire surface with a soft cloth. While still wet, take 220-grit sandpaper and gently abrade high points like rail tops and post edges—this removes wax and exposes bare wood where natural wear occurs. The contrast between stained grain and raw wood creates instant patina. Warning: Never sand through the stain layer; stop when you see pale wood showing. Finish by buffing remaining wax with a clean cloth for a soft, centuries-old luster.
Highlight Details with Dry Brushing and Glazing
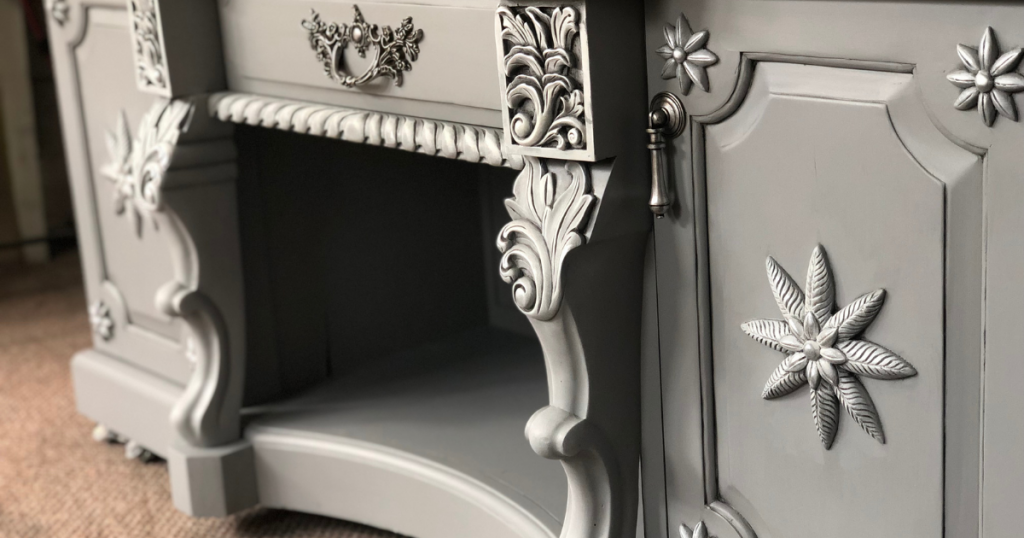
This technique adds 100 years of subtle aging in minutes. Dip only the very tips of a stiff-bristle brush into chalk paint (e.g., weathered gray). Wipe 90% off on newspaper until the brush looks nearly dry. Lightly drag it across carved details, raised panels, and bed frame contours—the paint catches only on high points, mimicking decades of dust accumulation. For deeper age, mix 1 part dark brown acrylic paint with 3 parts glazing liquid. Brush this over the entire piece, then immediately wipe most off with a crumpled plastic bag (not cloth—it absorbs too much). The glaze settles into cracks and carvings, creating shadowy depth. Focus extra glaze in distressing marks you’ve created—it pools naturally in dents like real grime.
Target High-Wear Zones Like a Pro
Amateur distressing looks staged because wear appears everywhere equally. Study your bed frame’s anatomy:
– Headboard top rail: Sand 40% of the front edge where heads lean
– Post corners: Create micro-dents 2 inches down from the top where hands grip
– Footboard base: Focus hammer strikes near floor contact points
– Side rails: Concentrate sanding on the top 1/3 where bodies brush against it
Use a pencil to lightly mark these zones first. Apply 3x more distressing to the right side of the bed (where most people sit) than the left. Distance matters too—wear intensifies within 6 inches of structural joints. Step back every 5 minutes to check balance; your eye should notice character, not pinpoint every mark.
Fix These 3 Costly Distressing Mistakes Immediately
Over-Sanding Creates “Zombie Wood” Syndrome
Newcomers often sand entire surfaces until wood looks uniformly worn—killing the contrast that sells authenticity. Stop when: You see raw wood peeking through only on edges and high-contact points, not across flat panels. If you’ve sanded too deep, apply a thin stain wash (1 part stain to 4 parts mineral spirits) to darken the area, then re-distress selectively. Always sand with the grain using 120-180 grit—cross-grain scratches scream “DIY disaster.”
Skipping the Wax Barrier Causes Uncontrolled Chipping
Paint won’t chip naturally without a release agent. Before your top coat, rub pure beeswax (not petroleum jelly) on areas where you want intentional wear—corners, edges, and raised details. Apply just enough to create a slick film. When you sand later, paint lifts cleanly from waxed zones, revealing crisp base layers. Too much wax? Wipe excess with mineral spirits before painting.
Ignoring Wood Grain Direction Ruins Texture
Sanding against the grain creates visible scratches that collect stain unevenly, looking like damage rather than age. Always test sanding direction on scrap wood first. For oak with prominent grain, sand perpendicular to grain lines to emphasize texture. For smooth woods like maple, sand strictly with the grain. Use light pressure—you should hear a whisper, not a roar.
Seal and Maintain Your Distressed Bed Frame for Decades
Your final sealant makes or breaks the aged illusion. For painted frames: Brush on matte water-based polycrylic with a foam roller. Avoid gloss—it reflects light, highlighting imperfections. Apply thin coats (2 is usually enough), sanding lightly with 320-grit between coats. For natural wood: Rub clear furniture wax into all surfaces, then buff with a cotton cloth until satin. Never use polyurethane on waxed wood—it won’t adhere.
Maintenance preserves your handiwork: Dust weekly with a microfiber cloth. For spills, use a barely damp cloth—never cleaners with ammonia or citrus that strip finishes. Every 6 months, revive waxed surfaces with a light reapplication. If paint chips develop beyond your original design, touch up with a toothpick dipped in base coat paint, then sand the edges to blend.
Distressing a wood bed frame isn’t about making it look broken—it’s about revealing the history it never had. By targeting authentic wear zones, layering finishes strategically, and sealing with care, you create furniture that feels like it’s been loved for generations. Start small: distress just the headboard this weekend. In 48 hours, you’ll sleep under a piece with more soul than anything from a showroom. When friends ask “How old is this?”, smile and say “Oh, it’s been in the family for years”—and they’ll believe you.


